1. Brief Introduction to the Artist
CATOPTOGRAM Visualization Studio
“We have been dedicated to spatial visualization and aesthetic presentation regarding architectural photography. Despite our busy schedule, the team have a passion for personal creation when not working and are all cat lovers:) We hope we can always explore the world with curiosity and passion, just like the cats.”
2. Portfolio
3. Intentions of creation
“As one of the earliest users of D5 render, we were just planning to switch our workflow to D5 for our studio’s commercial projects not long ago when the 1st D5 Challenge was launched. It served us well and gave us a chance to fully explore D5 workflow. The result, as you can see, is electrifying.”
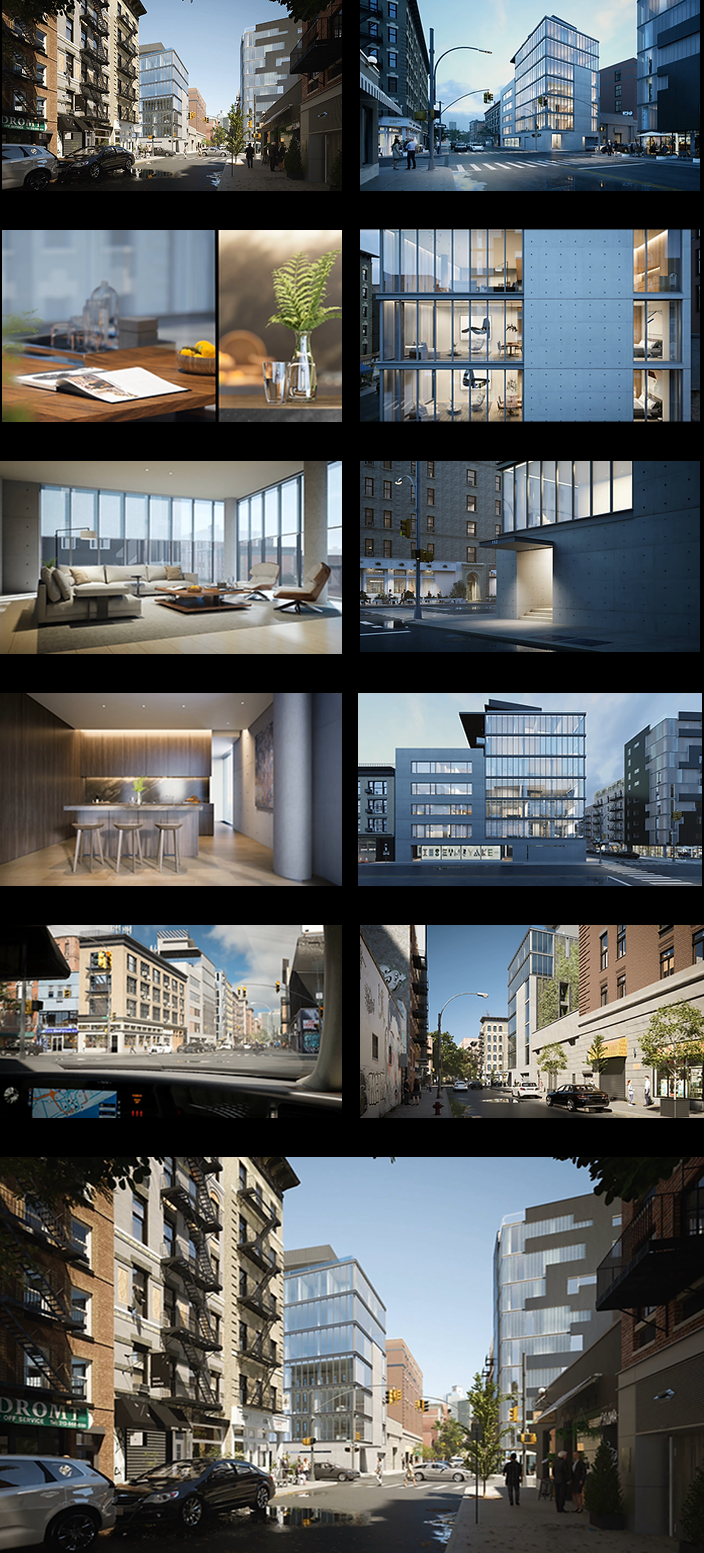
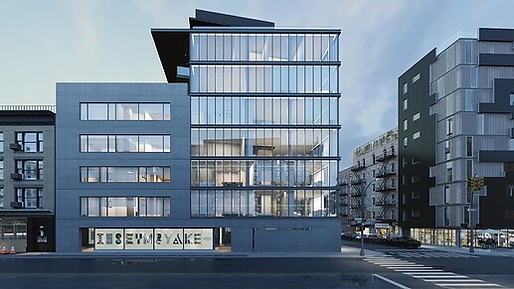
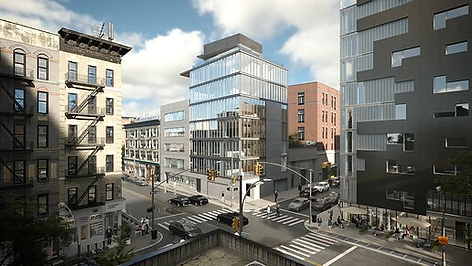
Reasons for choosing this Tadao Ando design:”For one thing, we wanted the kind of work where we can display D5’s strengths like real-time ray-tracing from all aspects. Therefore, we were looking for scenes with reflectors like large areas of glass, complex exterior environments and rich interior details. That finally led us to apartment 152 located on Elizabeth Street, NYC.For another thing, I personally take a liking to this project of Tadao Ando. Back in 2018, we had plans on visualizing this project and finished some of the work on main building restoration, but the project was later shelved due to all sorts of reasons. Three years after that, D5 Challenge has enabled us to restart this plan. “
4. Q&A
Workflow
Q: Can you briefly introduce your workflow?
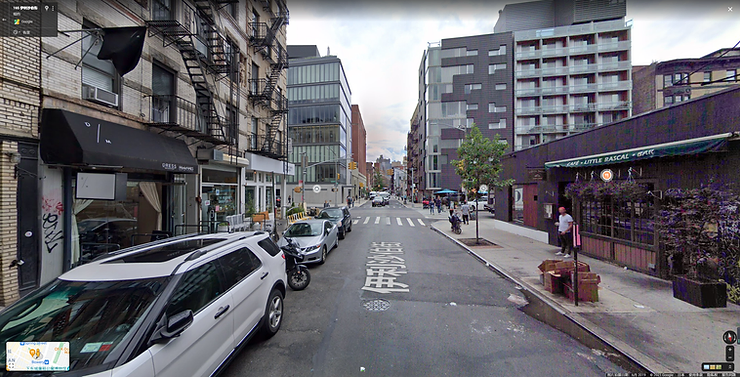
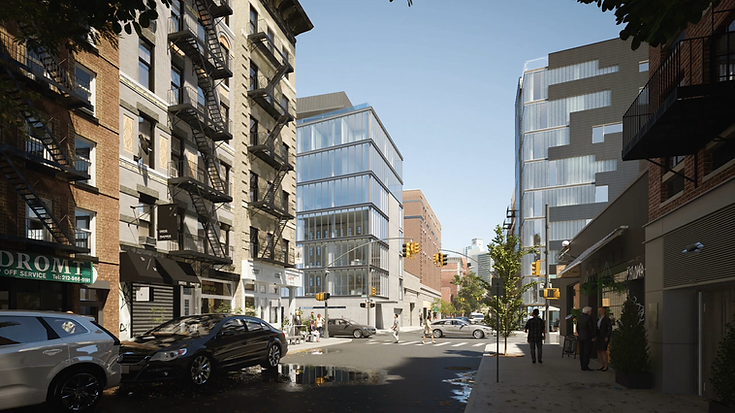
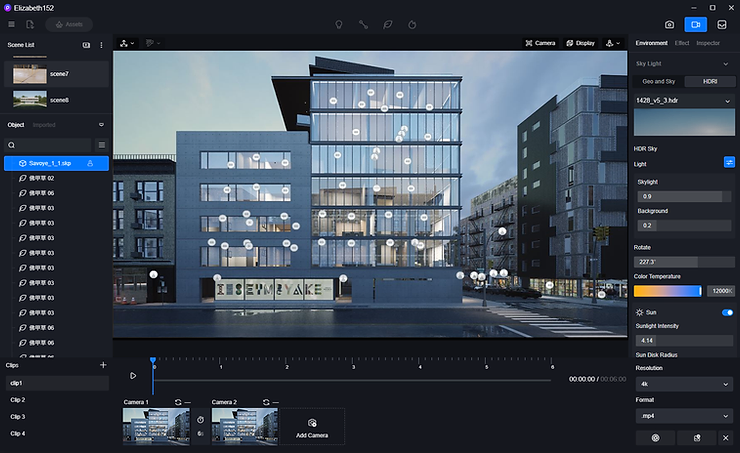
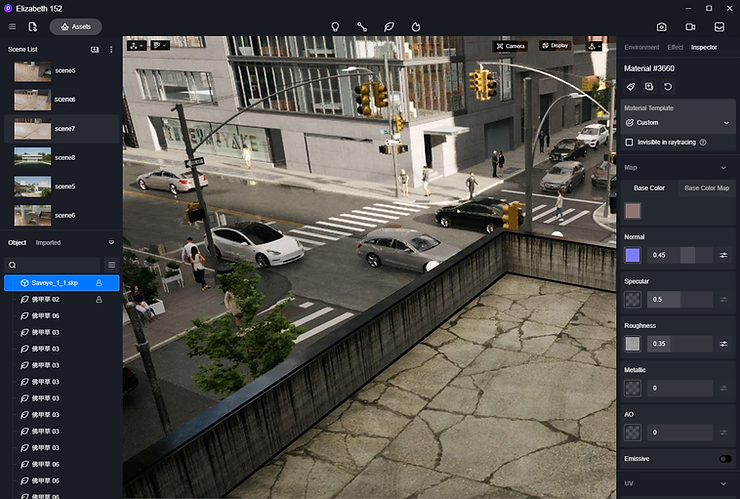
“We used Sketchup, 3ds Max, Quixel, D5, Photoshop and Premiere for making the scene.”As for modeling, we restored the main building based on the floor plan and photos collected online. Side buildings and streets were modeled with the help of satellite images and streetscape to bring back the real surroundings as much as possible. During the process, we applied PBR for all maps. We tried to live up to the real thing for even details like the patches on asphalt streets and where to place manhole covers. When all the modeling is done, we imported .skp files directly into D5 and .max files through D5 Converter – 3Ds Max, and then put everything in place. Next, we adjusted the scenes and arranged the animation clips. Last step, some editing, toning and background music are fixed in Premiere.
Exterior
Q: How did you match the colors and set lighting for the whole scene?
For example, in the night scene, we used photographers’ favorite Blue Moment to set the tone for the picture. An HDR at sunset was used for a blue skylight. Then we placed some warm lights inside the buildings to light up the interior space, so as to create a contrast of cold and warm.
*Note: Blue Moment refers to the short period of time before sunrise and after sunset, when the sun is just below the horizon and sky gives off a soothing blue. Pictures taken at this moment has a high saturation in blue, making this time of the day a great timing for photography.
Tips: Colors visually give people different sense of distance. Cold colors makes us feel distant, while warm colors pull us close. Such lighting contrast gets to highlight the building that we want to stand out.
We didn’t add a lot of light sources outside the main building. Considering too many light sources or poorly-organized lighting only make the scene lose its focus and weaken the expression of the main building, just a few mild light sources were placed to add to the overall atmosphere. The last step, we fine-tuned the scenes in D5 and applied LUT to make the scene and colors in harmony.
Interior
Q: Can you share your ideas on interior lighting?
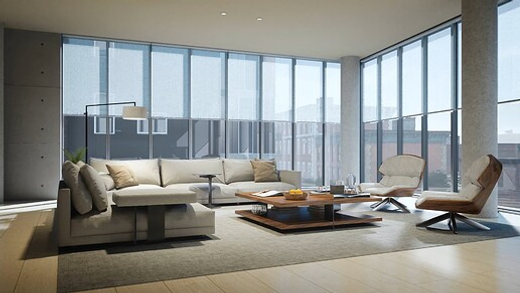
Considering the features of urban luxury condo, interior lighting is aimed at creating a soft and warm family atmosphere. That set the tone for our lighting: create the atmosphere using warm lights in warm scenes.
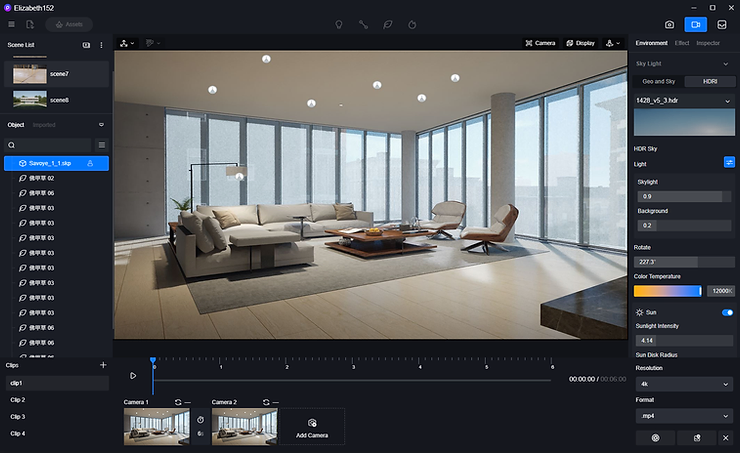
When it comes to lighting, I would set the spotlight according to the light layout in real life, and add skylight for moderate compensation.Real-life photography technique for lighting can be seen in some scenes where rectangular light is used to simulate softbox for the light to go indoors in a softer way.Where there is light, there is shadow. Shadow is what gives objects all kinds of layers in between. So we added some spotlights to shine on furniture, building up the layering of space.
Tips:Photography of interior projects is worth a view. Try to analyze the lighting tricks of photographers, and use light sources to stimulate supplemental lighting in real life.
Q: How to make and adjust the materials and maps?
“Maps are mostly made with PBR textures”For buildings, we selected corresponding maps according to the images, or we would browse through D5 assets library for suitable materials to perfect the details.We cropped out parts of the street image and processed them in Photoshop to produce materials in consistency with actual ones, which can be used after UV is adjusted in modeling software.Based on real-life streetscapes, streets were divided into parts for details. Grayscales were taken into consideration to determine how the streets look when flooded.
Q: Ideas on making animation?
“We continued with what we usually do in creation: arranging cameras according to the concept and requests of the project. Instead of stacking up the cameras, we laid emphasis on the logic of storytelling of space. Every camera in this work has been deduced to have a grasp of the time and pace.”
This time, considering that it is a metropolitan condo project, we divided the storytelling into 3 perspectives of passer-by, user and bird’s eye view.
From a passer-by perspective, it narrates the relationship between the building and the surroundings, helping the viewers step into the scenes. From a user’s perspective, it narrates how to drive to the condo, walk into the room and use the interior space with split-screen cameras. Towards the end of it, a bird’s eye view is offered to show the full picture of the environment and takes viewers out of the story.
Storytelling logically in place, we added a timeline of the drive from day to dusk, evening to the next morning. This timeline serves as a thread bonding one camera to another.
Overall camera arrangements in place, we went to D5 Render for detailed composition and moving lines of camera. Other details like the position of waterholes were also taken care of to make sure the graphic language keeps serving the main building.

Q: Any websites to share for aesthetic development?
We visit Vwartclub, Behance, Instagram, Archdaily, gooood, xinpianchang, and Artstation a lot, and collect works of the talents on these platforms.Beauty can be found everywhere. We love to go out for architectural photography and collect interesting storyboards. We also keep an eye on the works of CG artists and painters.
Practical experience in photography and film appreciation have offered us a great many inspirations. Seek talents from all walks of life and appreciate works from other fields. Break your boundaries and take in as much as you can. Go for photography, movies, paintings of different themes and subjects. These are my suggestions.
Theoretical materials are also worth reading in your spare time as they help you build up your cognitive frame. As for your own aesthetic system, when you have seen enough works of others, when you have learned enough from around you, and when ration and passion are mixed together, that should do the work for you.
Q: Anything to say to D5?
Based on RTX, D5 equips interior designers with an efficient work mode where they can sync with other modeling software and see how their works look real-time. That makes it a must for designers. But D5 has way more than that for us. We noticed some users have applied D5 for CG creation, showcase, preview and camera presentation for films, etc. Despite the existing flaws of D5, we have total belief that it is going to top the list of renderers.
Using D5, we did encounter some problems with the software. When we reported those problems in D5 group chat or D5 Forum, other users and the D5 team were always willing to reach out a helping hand. They would immediately come to us to make sure that we have further tech support to solve the problem. I once opened my project, only to find the models gone.(probably due to my misoperation)I freaked out! But lucky for me, tech team from D5 helped me recover the file. I truly appreciate their efforts.
5. Epilogue
“As those who kept an eye on the D5 Challenge last year might know, we didn’t submit the entry until the last minute due to our work schedule. The lack of time left us some disappointment during the production period. We have to say that whether the cameras, details or the final outcome were all more or less flawed.
However, everything comes with flaws. We hope that we can make up for the imperfections and fix the flaws. We also truly hope that we get to grow and get better with D5.”
Interviewee: CATOPTOGRAMArranged and posted by D5
Easter Egg
Seeing what CATOPTOGRAM has done in the first D5 Render Challenge, are you having the itch to create something yourself?That makes two of us! The 2nd D5 Render Challenge is around the corner. Stay tuned and we’ll let you know when the game is on.