
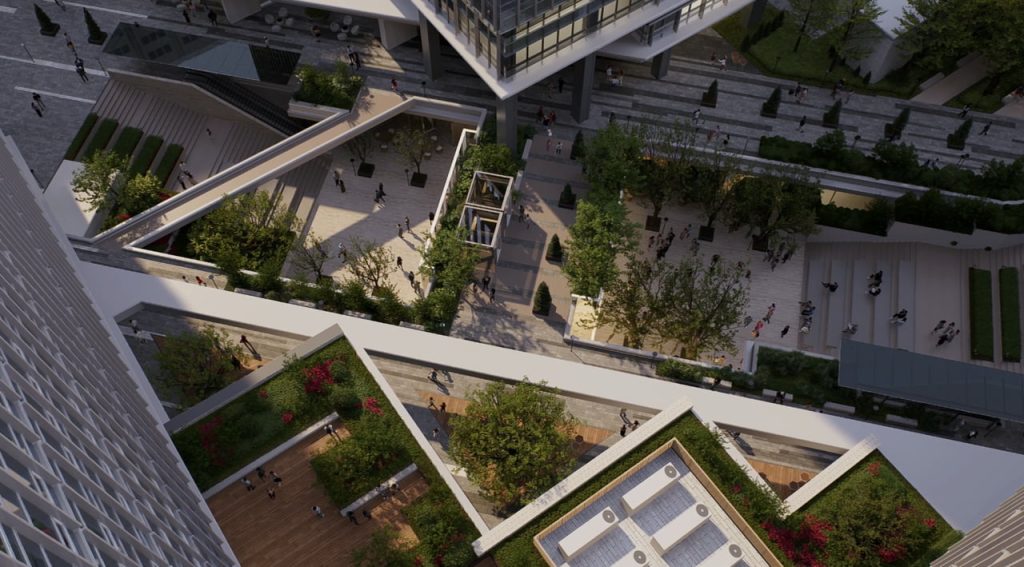
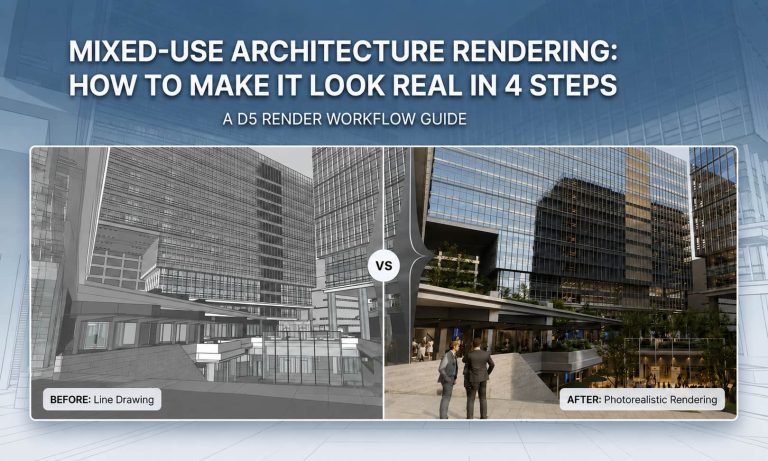
In early design, you're not after a final polished still image. You're testing whether materials and environment truly support the massing. And on a mixed-use complex, that test gets noticeably tougher. The tower, the courtyard, the retail edge, and the street edge all have to agree in one frame. In our experience, projects often stall here—not because the model is bad, but because those four layers never feel visually cohesive in a single frame.
This walkthrough follows a full mixed-use project from early concept to final image. We start in D5 Lite for fast mood exploration, then move into the full D5 Render when the scene needs real materials, planting, and life. The goal is to keep everything connected—rather than treating each zone as a separate software project.
Key Takeaways on Mixed-Use Architecture Visualization
- Mixed-use visualization usually fails in four key areas: curtain wall glass, ground plane materials, site life, and retail-edge lighting. It rarely comes down to polygon count.
- Fix curtain wall glass and the main ground plane before applying heavy scatter; if the tower still reads flat, planting won't save the frame.
- AI speeds up the setup, but you still decide when the facade looks believable enough against the site to start populating.
- Retail-edge lighting and parallax storefronts often carry more mood in the final frame than the tower crown—light the plaza before you chase the skyline.

Why Mixed-Use Projects Are Harder to Render Than They Look
You're balancing a glass curtain wall with warm retail interiors, aligning open plaza paving against planted zones, matching pedestrian scale with tower mass, and contrasting daytime clarity with evening storefront glow. Change one element—say, glass reflectivity—and the whole image can shift from convincing to clearly computer-generated.
In practice, teams waste time in two ways: rebuilding scenes when they move from concept tools to final rendering, and underinvesting in context (landscape, people, and traffic) once the main tower looks acceptable.
The 4-step D5 workflow below avoids both.
Step 1: Set the Early Direction in D5 Lite
At the early design stage, your first move is to test how materials and environment affect the building—rather than waiting for a polished model. On mixed-use projects, that first impression is typically about massing, courtyard character, and whether the curtain wall feels right for the program mix underneath.
Here's an early exploration workflow we've found effective, especially for complex program mixes:
- Launch D5 Lite inside your 3D modeling tool—such as SketchUp, Rhino, or Revit—then enter AI mode.
- Capture your current view and choose a style preset (e.g., Architecture → Office → Office Park). Adjust if the result doesn't match your intent.
- Adjust the structure weight slider to give the AI just enough creative freedom, then enter a short prompt for your desired mood.
- Generate a few options, then lock in the ones that feel right.
Save the references that align most closely with your intent. These images serve two purposes: as an internal design review tool and as a color/mood anchor for your final render.
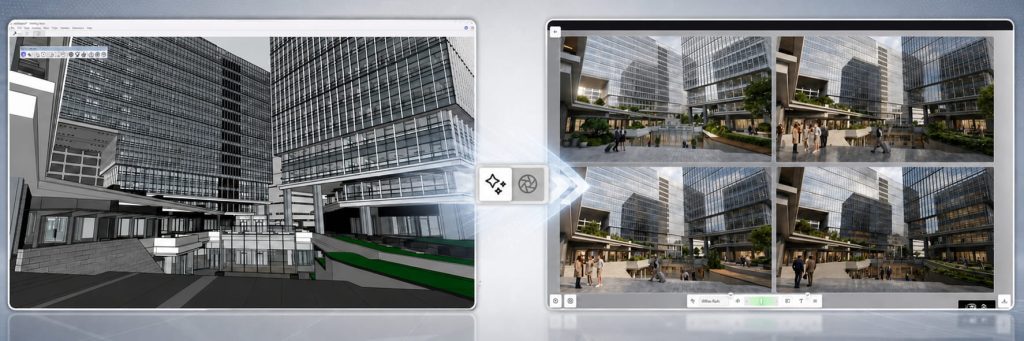
While you're still in D5 Lite, also adjust a few key materials—curtain wall glass, courtyard ground, exterior walls. Set ceiling light panels to emissive and tweak intensity and color temperature until interior warmth shows through the glass. A small environment lighting tweak here saves a ton of rework downstream.
Step 2: One-Click Sync into D5 Render—Then Fix the Glass
When landscape, finer materials, and site population start to matter, import the project from D5 Lite into D5 Render with a single click. Your model, materials, and camera views sync automatically—there is no need to rebuild the scene or re-frame cameras from scratch.
For mixed-use towers, glass is almost always the first thing to fix—and the first thing clients notice. This alone can scream "CGI" to a trained eye. Start by sampling the main tower glass, then enable Thickness to correct light refraction. Without this simple toggle, curtain walls will look completely flat or transparent. Add a subtle normal map and adjust UV scale for surface variation. Then nudge intensity, specular, and opacity until reflections look convincing and the facade picks up environmental context.
→ Also read: Glass Rendering Tips with D5 Render for Realistic Architectural Visualization
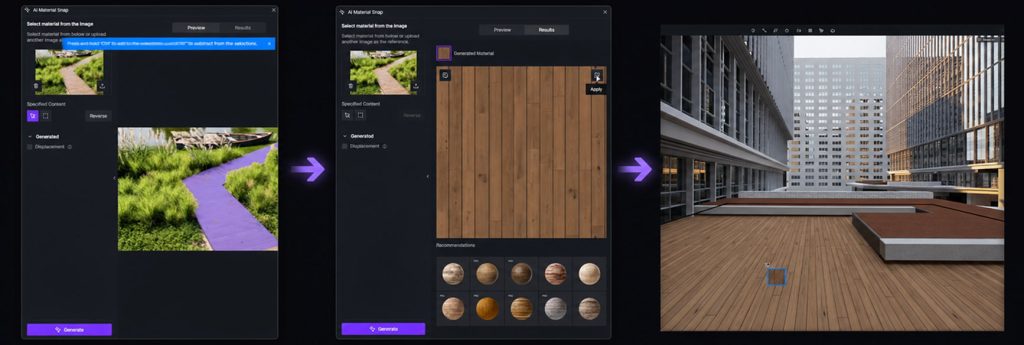
For plaza wood decking, D5 Render's AI Material Snap cuts manual setup time: upload a reference image, select the surface material you want to match, and let the AI generate the settings and apply them directly. From there, refine metal accents, paving, and wall stone to lift overall scene quality.
Glass and ground plane materials anchor the scene. Get those right, and the rest falls into place.
Step 3: Bring Your Mixed-Use Site to Life
Even a well-modeled tower on an empty plaza fails in review more often than you think. Mixed-use architecture must establish the public realm—the landscape belt, the sunken retail court, the street edge—not just the facade. This step runs in two passes: landscaping first, then human scale.
First, the landscape. Open D5 Render's scatter tool, select ground areas for planting, and pick trees or shrubs from the asset library. Density and size adjust on the fly—the whole landscape can come together in seconds when you're not overthinking the first pass. For tighter control, Area Divide splits the site into zones so plant types and density change by band; Edge Divide keeps greenery off paved areas.
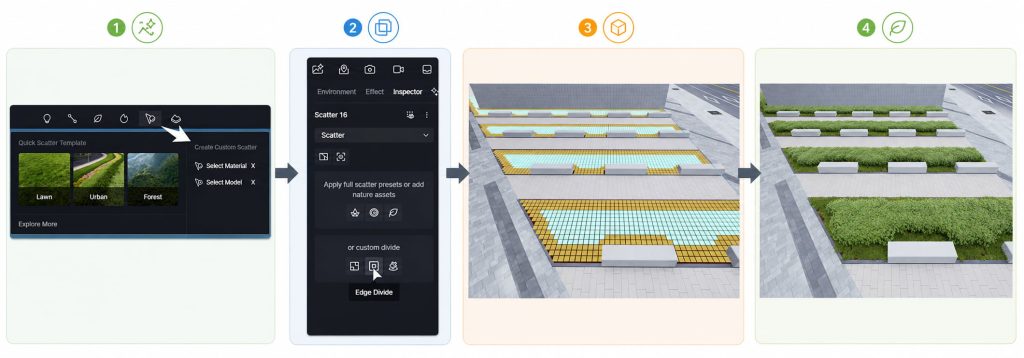
Want to speed up the initial scatter? Combine D5's AI Agent with manual brush control for best results.
- Use D5 Render's AI Agent: Pick a planting style preset or enter site location and preferences, and let it generate a plant list. When it looks right, Auto Scatter distributes everything across the selected area in one go.
- Then draw a path along the plaza landscape belt for street trees—bump up path randomness so spacing feels organic, not grid-perfect.
- Use the brush tool to add greenery around landscape pools. At entrances and the sunken plaza, place feature trees manually—you need to control where the eye lands.
Also read: 3D Landscape Scatter Tools in D5 Render You Must Know
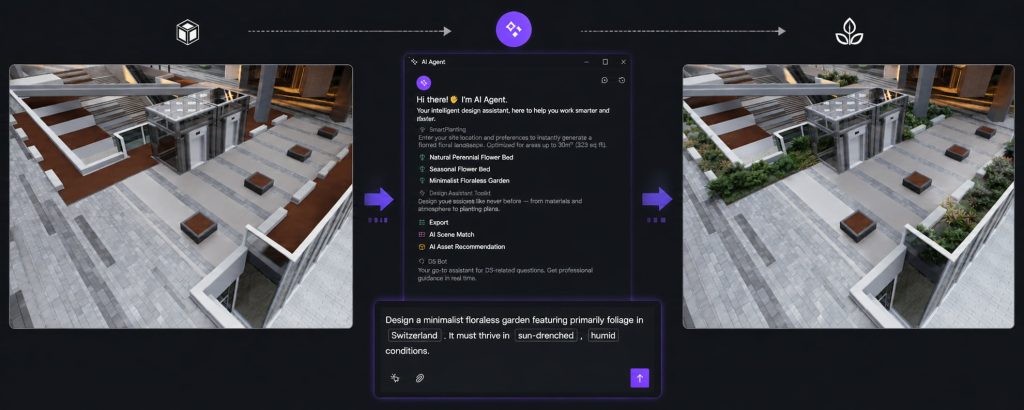
Next, continue populating the scene—landscaping alone won't make the scene feel occupied.
- Drag umbrella-and-seating combos into the sunken plaza and orient them until the outdoor seating reads naturally. Add landscape lights along the plaza edge if you're framing an evening view.
- Pull character groups from D5 Render's asset library or D5 Works and place seated figures where people would actually pause—not scattered at random, but where the space invites stopping.
- On the main road, draw a path, choose a mix of cars and buses, configure two-way traffic on a six-lane road, and adjust density and random spacing until traffic reads like a real urban street.
Pro Tip: Don't treat scatter as a one-click finish. Uniform planting across the whole plaza is what makes mixed-use sites look artificial—like a render, not a real place. Zone the landscape, then populate—both layers are essential to ground the project in reality.
Step 4: Lock the Mood and Deliver Your Mixed-Use Render
Lighting is what turns a correct model into a convincing mixed-use still. And on these projects, the retail edge often carries more mood than the tower crown. Storefront warmth, interior depth behind glass, and sky tone—those are what clients respond to in the final frame.
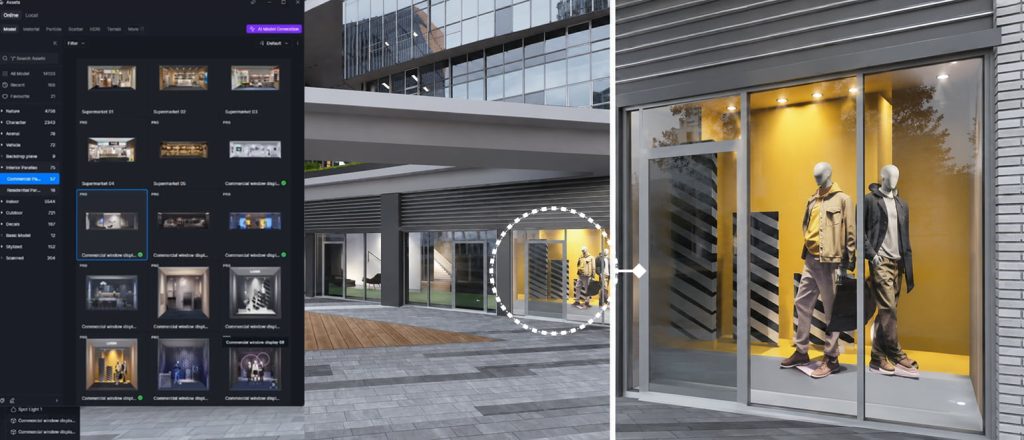
Start with the sunken plaza. Place area lights along the interior side of each storefront. Tune brightness and color temperature until the shops feel warm and welcoming from outside. Add spotlights for accent where you need extra punch. Bring in parallax assets from the library, place them behind the glass, and adjust brightness and temperature—the parallax depth sells interior life when you're looking across the plaza, not into a dark void.
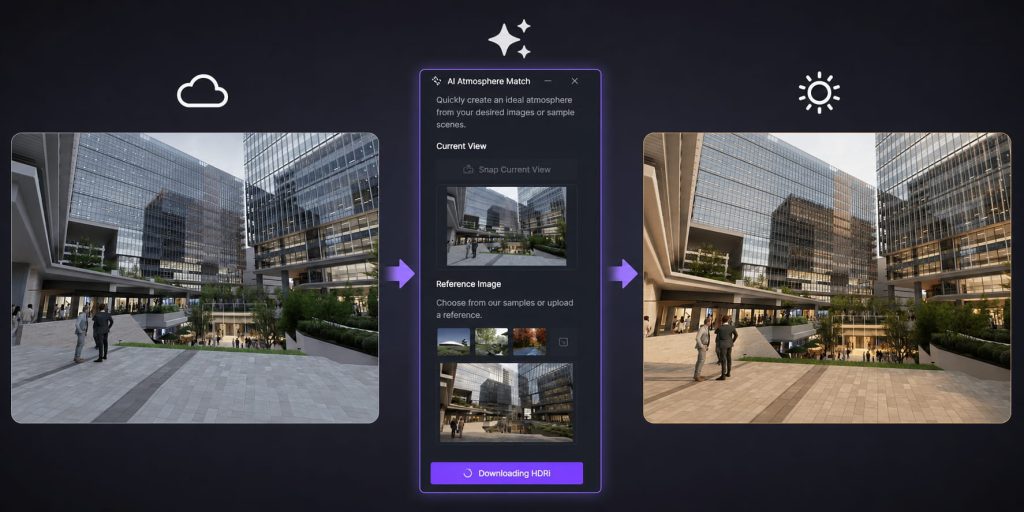
For the overall mood, open D5 Render's AI Atmosphere Match and upload the D5 Lite reference you saved in Step 1. The tool aligns sky, natural lighting, and color tone to that image—so the mood you locked in Step 1 can still show up at delivery. Sky angle and brightness stay adjustable afterward.
Once lighting is set, frame your final camera views. Before you render, enable the AI Post Channel in your output settings. D5 saves scene passes—albedo, normals, material IDs—so AI Post Processing knows what's sky, vegetation, and entourage. After the render finishes, use it to sharpen materials, clean shadow noise, or inpaint thin planting without a Photoshop round-trip.
A Practical Workflow Framework for Mixed-Use Architecture
Use this priority framework as a quick checklist for your next mixed-use project:
- Lock a mood reference in D5 Lite first—save two or three directions you'll still trust by delivery. No reference yet? Generate them in AI mode and keep the best one.
- Fix the elements that establish scale before planting—curtain wall glass and the main ground plane. If the tower reads flat, don't scatter yet.
- Add life in two passes—green structure first (scatter zones, path trees), then human scale (furniture, people, traffic). Skip either pass and the plaza feels empty.
- Light retail edges, match atmosphere to the Step 1 reference, export with AI Post—then retouch only what the client actually comments on.
Conclusion: A Seamless Mixed-Use Rendering Workflow
Mixed-use architecture starts to feel real when the building facade, the site, and the retail edge all cohere in a single frame. D5 Lite enables fast early exploration; D5 Render takes that same project through materials, landscape, population, lighting, and final atmosphere—without fragmenting the workflow across disconnected tools.
Try the D5 workflow on your own model and see for yourself how fast a believable exterior can come together—from the first sketch to the final still.
Continue Reading on Mixed-Use Architecture
Archviz Review: Rendering a Commercial Plaza with D5 Render
Want Better Exterior Renderings? Try These 3 Steps in D5 Render
FAQ on Mixed-Use Architecture Rendering
Mixed-use architecture rendering is the process of creating presentation-grade visuals for developments that combine multiple programs—retail, office, residential, or public realm—in one project. Unlike a single-use tower shot, the image has to sell facade scale, plaza life, and street activity in one frame. When any layer reads disconnected, the whole development feels like CGI.
That depends on model complexity and how much context you add. But a staged D5 Lite-to-Render workflow often gets a mixed-use scene from concept to delivery-grade stills in a single working session. Early AI exploration in Lite saves hours of manual mood iteration; one-click sync avoids rebuilding the scene for final delivery. A good rule of thumb is to budget a few hours for the first try, then expect the setup time to drop significantly once you've developed a steady workflow.
Use D5 Lite during the early design ideation phase directly inside your modeling software (like SketchUp, Rhino, or Revit). It's optimized for fast AI mood exploration, quick massing tests, and early material reads. Transition to the full D5 Render app when you are ready to produce final deliverables—that's when you need advanced landscape scatter tools, heavy scene population, precise artificial lighting, and high-resolution rendering. Because they sync with one click, you can move between concept and production without rebuilding your work.
In most cases, it's because single-sided glass surfaces fail to bend light correctly. Enable Thickness on curtain wall glass in D5 Render, add a subtle normal map for surface variation, and tune reflectivity and opacity. Interior emissive materials (set in Lite or Render) also help glass read as a real facade rather than a transparent plane. If it still looks flat, check your environment—glass needs something to reflect.
No. One-click import brings your model, materials, and camera views into D5 Render intact. Budget time for refinement—glass thickness, scatter zones, population, retail lighting—not for re-importing geometry or re-framing every view from scratch.
Think about where people actually stop. Place character groups at human scale near furniture and plaza edges—seated figures in seating areas read more naturally than crowds of standing people. For roads, use D5 Render's Path tool with vehicle assets, set lane count and direction, then tweak the flow and speed so the vehicles look like they are in motion, not stuck in a grid. Don't just dump cars everywhere—create a natural urban rhythm.
Not entirely, and that's by design. D5 Render's AI Atmosphere Match aligns sky, natural light, and overall tone to a reference image—useful for keeping concept-to-final consistency. But you'll still want targeted artificial lighting for retail storefronts and parallax windows at plaza level. Think of Atmosphere Match as mood lock, not a substitute for scene-specific lights. Use it to set the stage, then fine-tune with your own lights to make the space feel lived-in.
 English
 Español
 Français
 한국어
한국어 日本語
日本語