Achieving realistic velvet material can be a challenge, but it's one that's absolutely worth mastering.
Velvet fabric's rich texture, unique sheen, and deep shadows interact with light in ways that make it both stunning and difficult to render accurately. So how do you make velvet texture look its best in D5 Render? The answer lies in understanding how this material behaves under different lighting conditions and knowing the key settings to adjust for the most lifelike results.
In this guide, we'll break down the essential techniques, and show you how to fine-tune each for stunning realism. Ready to bring your velvet material to life? Let's get started!
Key Takeaways on Achieving Realistic Velvet Material in D5 Render
- Realistic velvet in D5 comes from mastering light behavior, not just textures.
- Start with D5's velvet presets, then refine using normal maps, specular, falloff, and AO.
- Balanced adjustments create the fabric's plush depth and signature soft sheen.
- D5's real-time preview makes fine-tuning fast and intuitive, cutting trial-and-error.
- Post-processing and Material ID passes give velvet that final professional polish.

1. Why Velvet Material is a Rendering Challenge (and How D5 Render Solves It)
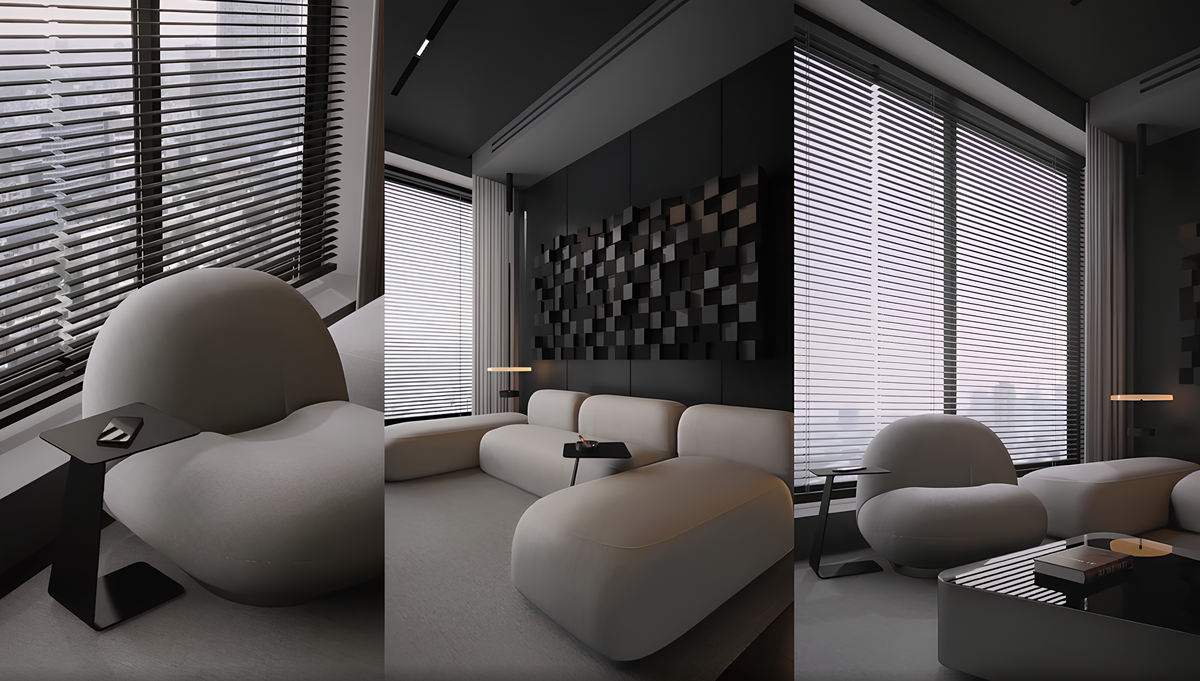
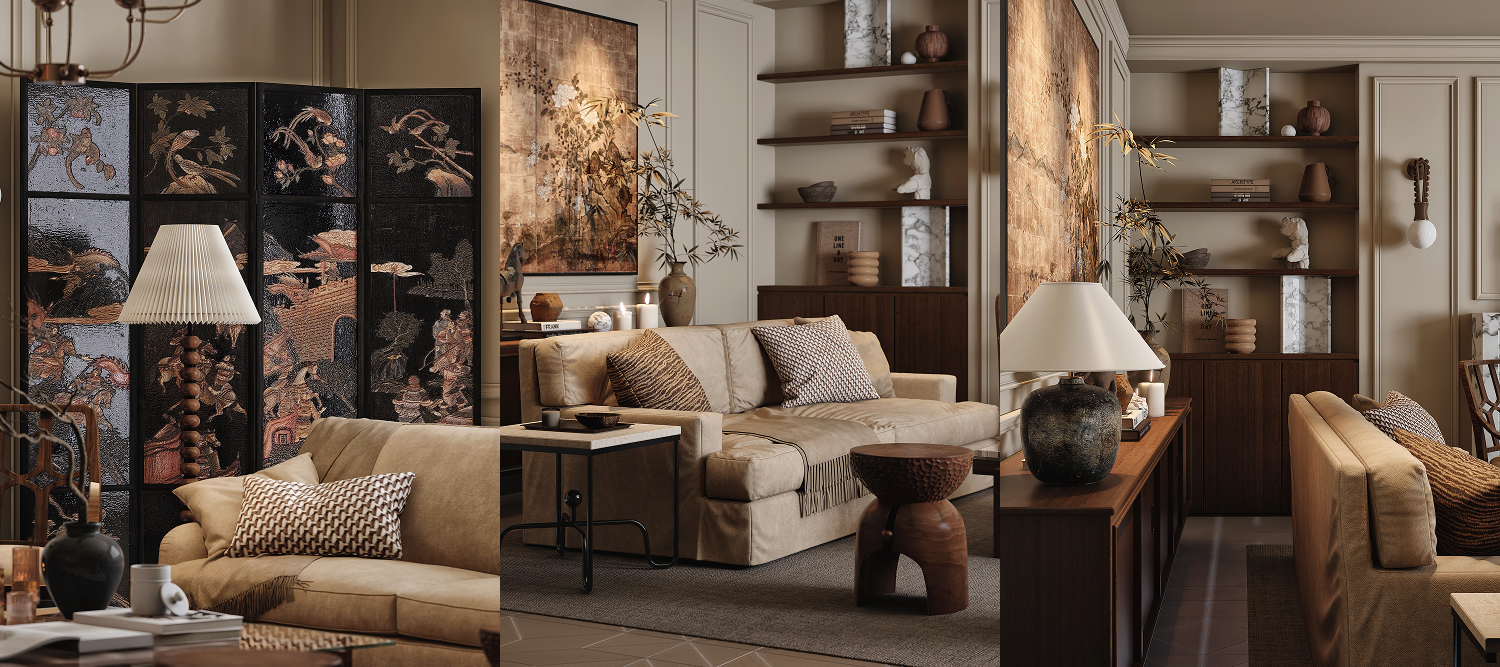
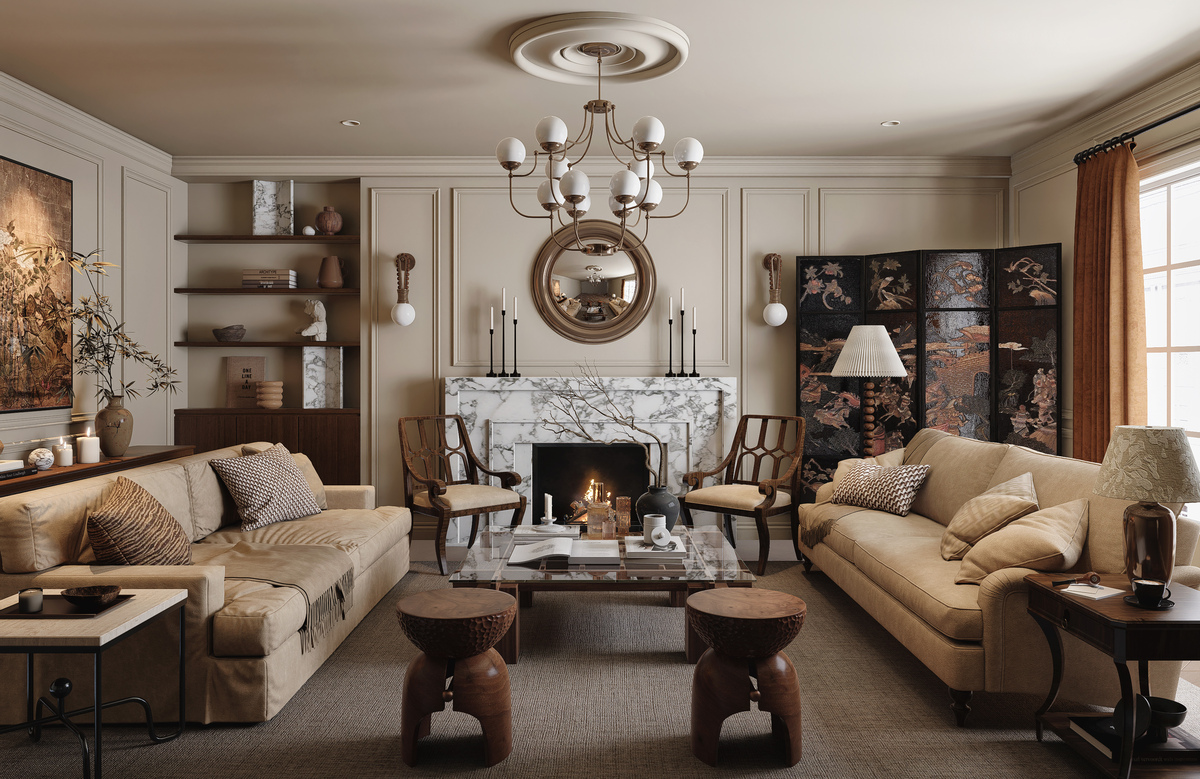
Velvet fabric has been synonymous with luxury for centuries, and for good reason—its signature plush texture, subtle sheen, and rich depth make it one of the most challenging yet rewarding fabric textures to recreate in 3D rendering. Unlike flat or uniformly reflective surfaces, velvet material behaves dynamically under light, shifting between deep matte shadows to soft, diffused highlights depending on viewing angle.
So why is velvet so tricky to get right in digital renders? Traditional rendering methods often struggle with its complex micro-surface structure, failing to balance its inherent softness with controlled glossy reflections. Many artists resort to exaggerated bump mapping or manual light tweaks, leading to artificial-looking results.
This is where D5 Render's smart material system shines. Unlike basic rendering engines, D5 provides optimized presets like Velvet 01 and Velvet 02 in its Cloth Material Library - designers only need to make simple tweaks based on their scene environment to achieve perfect velvet fabric materials every time. Designed specifically to mimic real-world material velvet behavior, these presets offer intuitive controls for sheen falloff, micro-surface texture, and light response, letting designers bypass tedious trial-and-error and focus on creative refinements. Plus, D5's real-time rendering instantly visualizes adjustments - no more waiting for test renders to diagnose flaws.
2. Setting Up Velvet Material in D5 Render
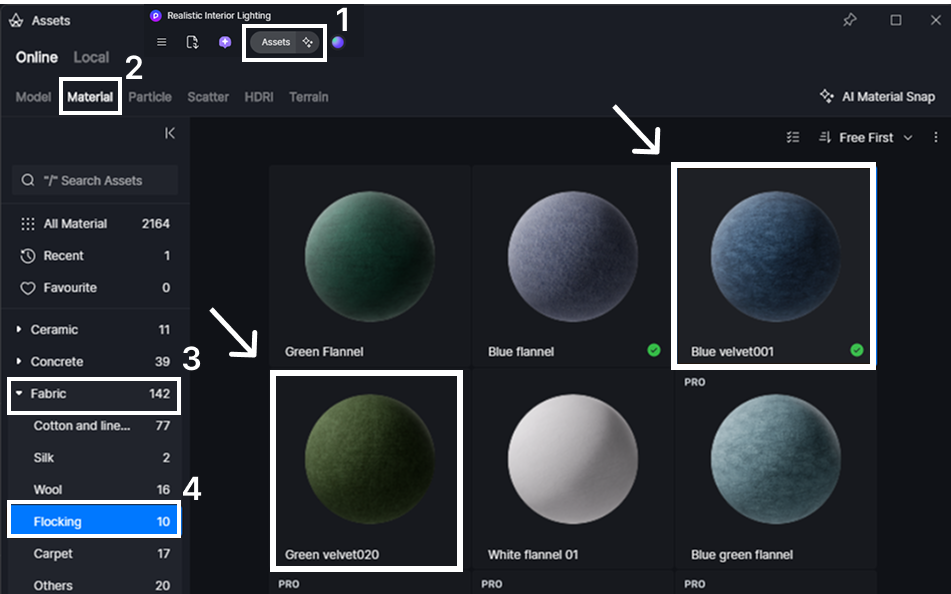
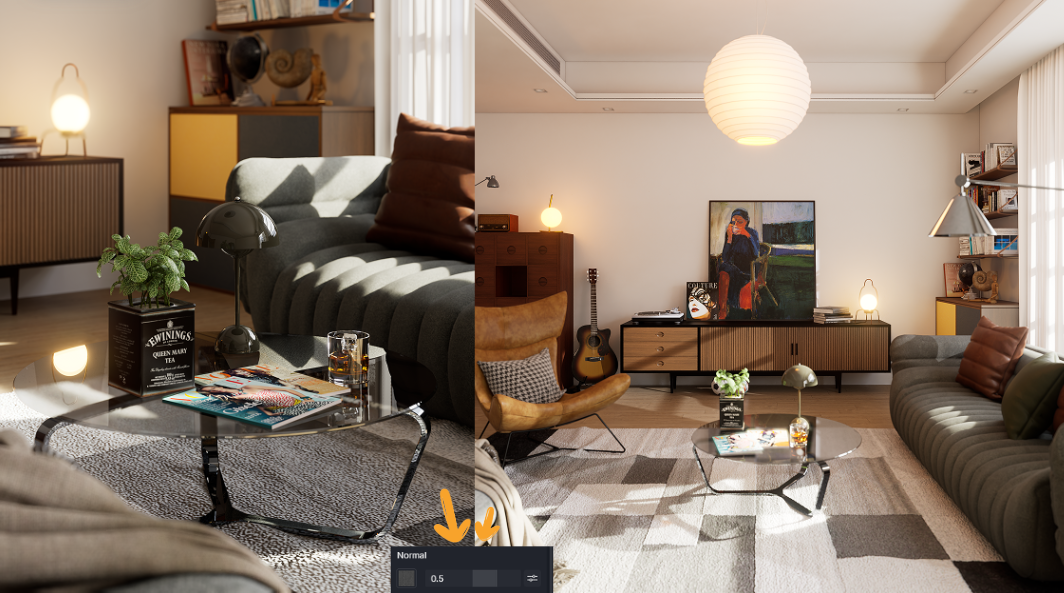
Start by selecting the perfect base material from D5 Render's vast asset library. Simply navigate to Assets > Material > Fabric > Flocking or directly search "Velvet" under Material options to locate pre-configured velvet presets like "Velvet 001" and "Velvet 020" - these industry-tested starting points already account for velvet fabric's unique light absorption and sheen properties. Simply apply them to your models (whether furniture, drapes or accessories) as your foundation.
For photorealistic results, these presets provide an excellent foundation that you can further refine. Velvet texture is not just another fabric texture; it presents a unique lighting challenge that can make or break your 3D scenes. Some key parameters play a crucial role in achieving the authentic feel of velvet material, such as normal maps, specular reflection, Falloff, and AO.
3. Adjusting Key Parameters for Velvet Realism
Velvet fabric isn't just another fabric - it's a lighting challenge that can make or break your 3D scenes. Getting that signature rich texture right requires some careful tweaks in D5 Render, but don't worry, we'll walk you through exactly how to nail it.
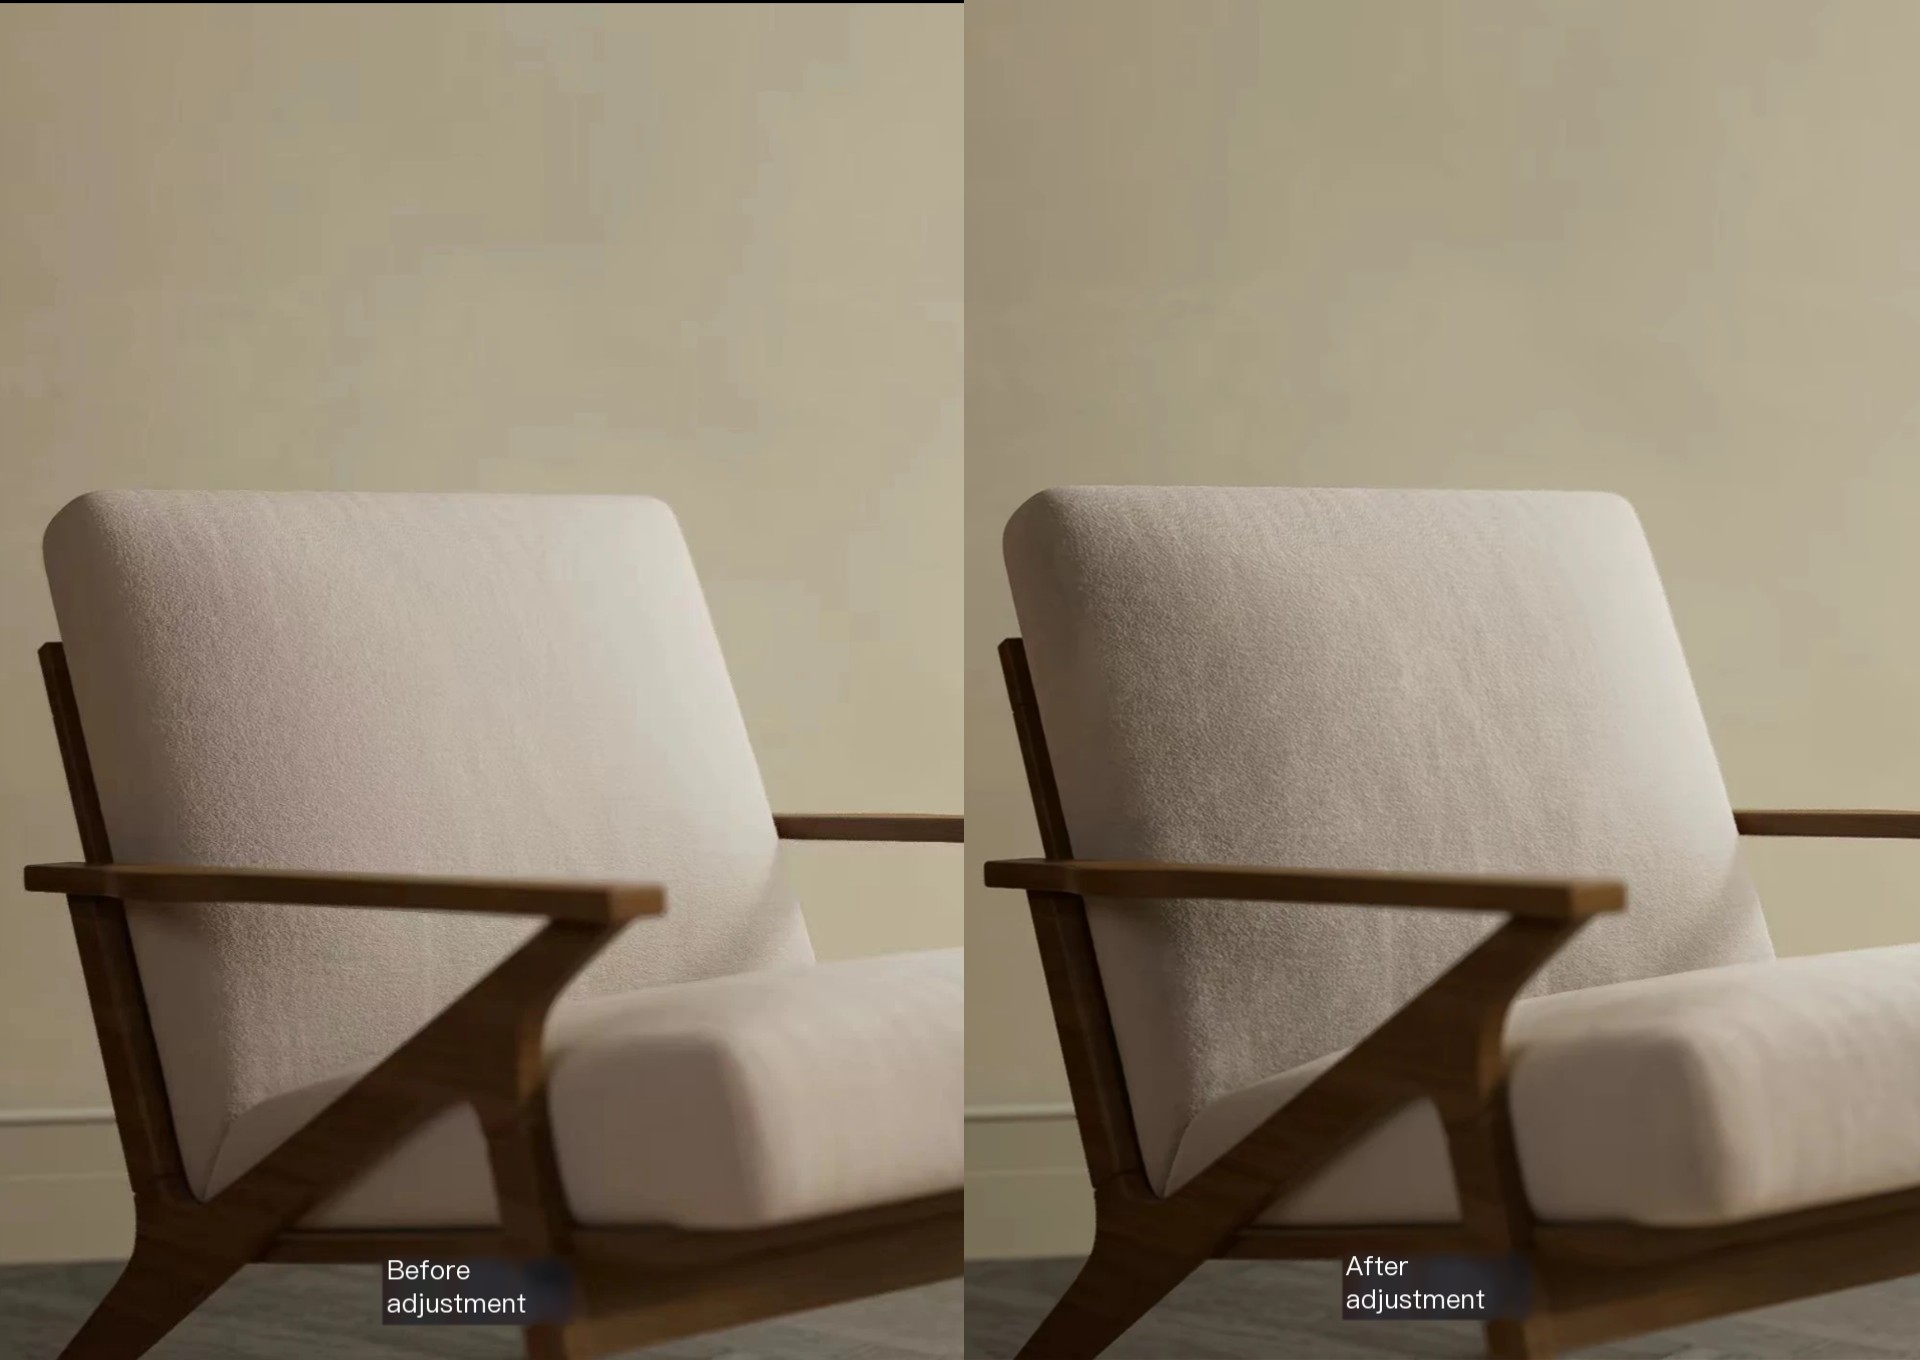
① Normal Maps: Enhancing Velvet's Soft Texture
For convincing velvet texture, start with the normal map. This is what gives velvet fabric its signature soft, tactile quality by simulating the tiny fiber imperfections on the surface. In D5 Render, we recommend setting normal map strength between 0.3-0.5 - this range effectively mimics velvet's gentle pile without making it appear overly rough or artificial. Values that are too low may appear too flat, while anything too high tends to create an exaggerated, unrealistic texture.
Pro tip: Test different lighting angles after adjusting to ensure the fibers look natural from all views!
② Specular Map: Capturing Velvet's Signature Glow
The specular map is your best friend when crafting that perfect fabric velvet glow. It determines where and how intensely light reflects off the surface - crucial for getting that signature velvet texture. Unlike glossy fabrics like satin, velvet has a much more subdued sheen that changes based on viewing angles.
Here's the sweet spot we recommend: Keep your specular value in the 0.25-0.5 range (corresponding to an F0 reflectance of 2%-4%) in D5 Render. This creates just enough surface reflection to mimic real velvet material's luxurious-but-subtle glow without crossing into unnatural shine territory - what you're going for is that soft, direction-dependent sheen that gradually appears when the fabric catches light at certain angles.

③ Falloff: Perfecting Velvet's Luxurious Sheen
Mastering falloff is what will truly make your velvet material sing. This setting controls how light interacts with velvet's dense, layered fibers - it's responsible for that signature "sheen" that appears when light grazes across the surface. Here's what makes it so special:
In D5 Render, when you increase the falloff parameter, you're essentially controlling how prominently velvet fabric displays its distinctive "white glow" effect - what material artists call "sheen". This is most visible when the fabric surface becomes nearly parallel to your viewing angle (like on rounded sofa arms or deep folds).
Pro tip: High-quality velvet fabrics need higher falloff values to properly simulate their dense pile. But be careful - overdoing it can make the material look artificially "frosted" rather than naturally lustrous. The sweet spot typically lies between 0.7-1.2 in D5 Render's settings for most velvet applications.
④ Ambient Occlusion (AO): Enhancing Velvet's Depth & Dimension
Lastly, AO plays a key role in velvet's realism. AO simulates how light gets absorbed into crevices and folds, enhancing the fabric's depth and contrast. In D5 Render, increasing AO can add subtle shadows around the velvet material's details, such as along its seams or near its folds, helping the material appear more three-dimensional. It's all about getting the right balance: too little AO will make the fabric look flat, while too much can overwhelm the natural highlights.
The real magic happens when you balance these four key settings. Get this combo right in D5 Render, and you'll have velvet that doesn't just look real - it feels real. The best part? You can see your changes instantly while tweaking. Play with the sliders, rotate your view, and watch how each adjustment transforms your fabric under different lighting. That's the power of D5's real-time workflow - making photorealistic velvet easier than ever to achieve.
4. Polishing Your Velvet Renders: Final Touches in D5 Render
Once you're happy with your velvet material setup, it's time to give your textures that extra sparkle. These final rendering tips will help take your velvet to the next level:
1. Perfect Your Look with Post-Processing:
D5's user-friendly post-production tools make it easy to fine-tune your velvet's appearance. For example, Start with the LUT presets to set the right mood, then adjust the contrast to make those rich folds stand out. A slight boost in sharpness (around 15-20%) works magic to highlight the fabric's plush texture, giving it a more lifelike feel without adding harsh edges.
2. Smart Rendering with Material ID Passes:
Here's a pro tip: Before you hit render, always check the Material ID Channel option. This generates a separate pass that isolates your velvet material, so you can adjust its sheen or color temperature in post-production without affecting the rest of your scene. It's a great way to keep things flexible and precise while saving time.
Learn more about D5's post-processing effects:
? How to Use Emissive Material in D5 for Better Lighting of Your Renders
? Download free HDRI skies for D5 – boost realism instantly
? How to Use D5 Studio's Curated Environment Presets
? Best practices of interior lighting for SketchUp

The beauty of D5 lies in how these professional-grade finishing tools remain accessible. With just a few thoughtful adjustments, you can take your velvet materials from good to gallery-worthy.
5. Conclusion: Bring Your Velvet to Life in D5 Render
Congratulations—you're now equipped with the secrets to creating stunningly realistic velvet materials in D5 Render! By fine-tuning normal maps, specular gloss, falloff, and AO, you can achieve the perfect balance of plush softness and subtle sheen.
The best part? D5's real-time preview lets you see your adjustments instantly—no waiting for test renders. Now it's your turn: Experiment, tweak, and bring that luxurious velvet texture to life. Try it today and watch your renders transform from good to breathtaking!
Got your own velvet tips? Drop them in the forum!
Read More to Master Hyper-Realistic Materials in D5 Render
? How to Render Glass Materials?
? Need Free PBR Textures? Try AI PBR Material Snap in D5!
? How to Create Perfect Blade of Grass with D5 Render?
? D5 Render's AI Texture Generator: Speed + Realism Boost
? Seamless Texture Generator: Boost D5 Render Visuals
? Outstanding Water Textures Taking Your Renderings up a Notch
FAQs on Achieving Realistic Velvet Material in D5 Render
Q: How do I make velvet material look realistic in D5 Render?
A: Use D5 Render's velvet presets as your starting point, then adjust normal maps, specular, falloff, and AO. This combination recreates velvet's plush depth and soft sheen. With D5's real-time preview, you can instantly test lighting angles and refine details, achieving lifelike fabric that feels tactile and authentic in your 3D interiors.
Q: What is the best way to simulate velvet's soft texture in 3D rendering?
A: Velvet softness comes from fine surface detail. In D5 Render, set normal map strength around 0.3–0.5. This range mimics velvet's fiber pile without exaggeration, adding subtle tactile depth. Always rotate your camera under different lights to confirm the fabric looks naturally soft and luxurious from every angle.
Q: How do I adjust the specular map to get velvet's subtle sheen?
A: Velvet requires a restrained glow. Keep specular between 0.25–0.5 (about 2–4% reflectance) in D5 Render. This range produces the angle-dependent shimmer velvet is known for, without turning glossy like satin. The result is a fabric that glows softly under grazing light, looking natural and elegant in your render.
Q: What settings should I tweak to create velvet's rich depth in D5 Render?
A: For velvet's depth, combine normal maps for softness, specular for subtle highlights, falloff for luxurious sheen, and AO for shadow detail. D5 Render lets you balance these in real-time, building a fabric that has plush dimensionality. Together, these adjustments transform velvet from flat texture to a photorealistic surface.
Q: What are the recommended values for normal map strength with velvet in D5?
A: For velvet, aim for a normal map strength of 0.3–0.5 in D5 Render. This range produces the fabric's soft pile effect without distortion. Too low looks flat; too high appears artificial. Testing under varied lighting confirms the texture feels natural and consistent from every viewing angle.
Q: How do I adjust velvet's sheen and glossiness to avoid an artificial look?
A: Set specular values low (0.25–0.5) for soft reflection, then use moderate falloff to shape natural luster. Avoid pushing gloss too high, which makes velvet resemble satin. In D5 Render, the right balance creates a subtle, direction-dependent glow—authentic to velvet's luxurious yet understated character.