Let's be real—setting up software across an entire computer lab is usually a headache. Shared computers, login chaos, IT tickets piling up… not exactly what you want when students are trying to learn. That's why we built the D5 Lab License to skip the fuss. No accounts, no activation drama—just install once, and every workstation is ready to go.
In this guide, we'll walk you through installation step-by-step—no tech jargon, no wasted time. Whether you're managing a design lab or media workstation, you'll have D5 up and running before class starts. Ready? Let's get those workstations render-ready.🚀
Key Takeaways from the D5 Lab Installation Guide
- Prep & Log In First – Verify your admin account is activated, then access D5’s Lab Management interface to begin setup.
- Secure Your Lab’s IP Configuration – Define up to three outbound IP addresses before installation—this ensures D5 Lab only operates within approved locations.
- Protect Your Secret Key – Retrieve it from the Lab Dashboard for installation. If exposed, regenerate immediately—old keys deactivate instantly.
- Opt for Silent Installation for Bulk Deployments – Use scripted commands with embedded paths, EULA acceptance, and Secret Key for automated setups.
- Always Use the Latest Installer – Version names update frequently; download the newest package from the Lab Management backend to avoid issues.

Why D5 Lab License? Solving Real Classroom Challenges
University labs need specialized tools! The Lab License isn't just about removing logins - it's about removing every barrier between students and creation:
- Zero-login floating seats: Install once across all lab PCs; students open D5 instantly like any classroom software—no individual accounts needed.
- Batch-ready for IT teams – Deploy via silent scripts to bypass manual setup (Say goodbye to activation errors during lab sessions!)
- Full PRO power, education-tailored: AI tools, VR walkthroughs, and asset libraries—all unlocked campus-wide, with version updates handled automatically.
👇Now, let's get your lab up and running—without the usual tech headaches.
1. Registration and Login
- Confirm with your D5 contact that your Lab (LAB) account has been activated.
- Use your admin account to log into D5 at https://myspace.d5render.com/
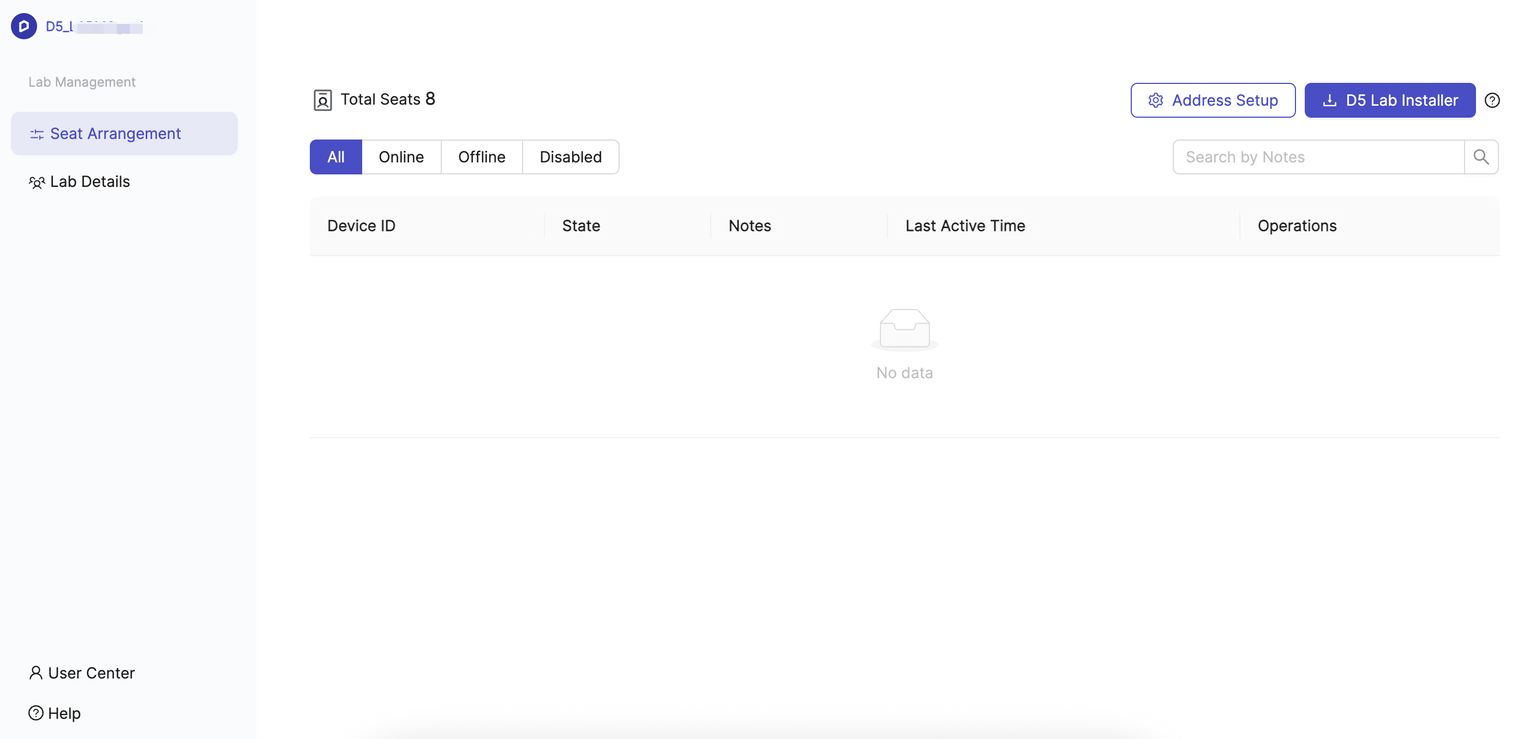
- Click on the Lab Management entry to access the management interface.

👇 Access the LAB Management Interface:
2. Download
① Configure Your Organization’s Lab Address
- Before the initial installation, set up the unified "outbound IP" for the Lab Computers.
- Before installing for the first time, you need to set the address(es) of your organization’s computer lab(s). The D5 Lab-edition client can only be installed and used within the specified address range(s).
- You may configure up to three different addresses.

② Download the D5 Lab Installer
Once the lab address has been configured, click [Lab Installer] to download the installation package through your browser.
.png)
3. Installation
3.1 Secret Key
The Secret Key is a security measure to protect your account and prevent unauthorized resource usage.
How to Get the Secret Key?
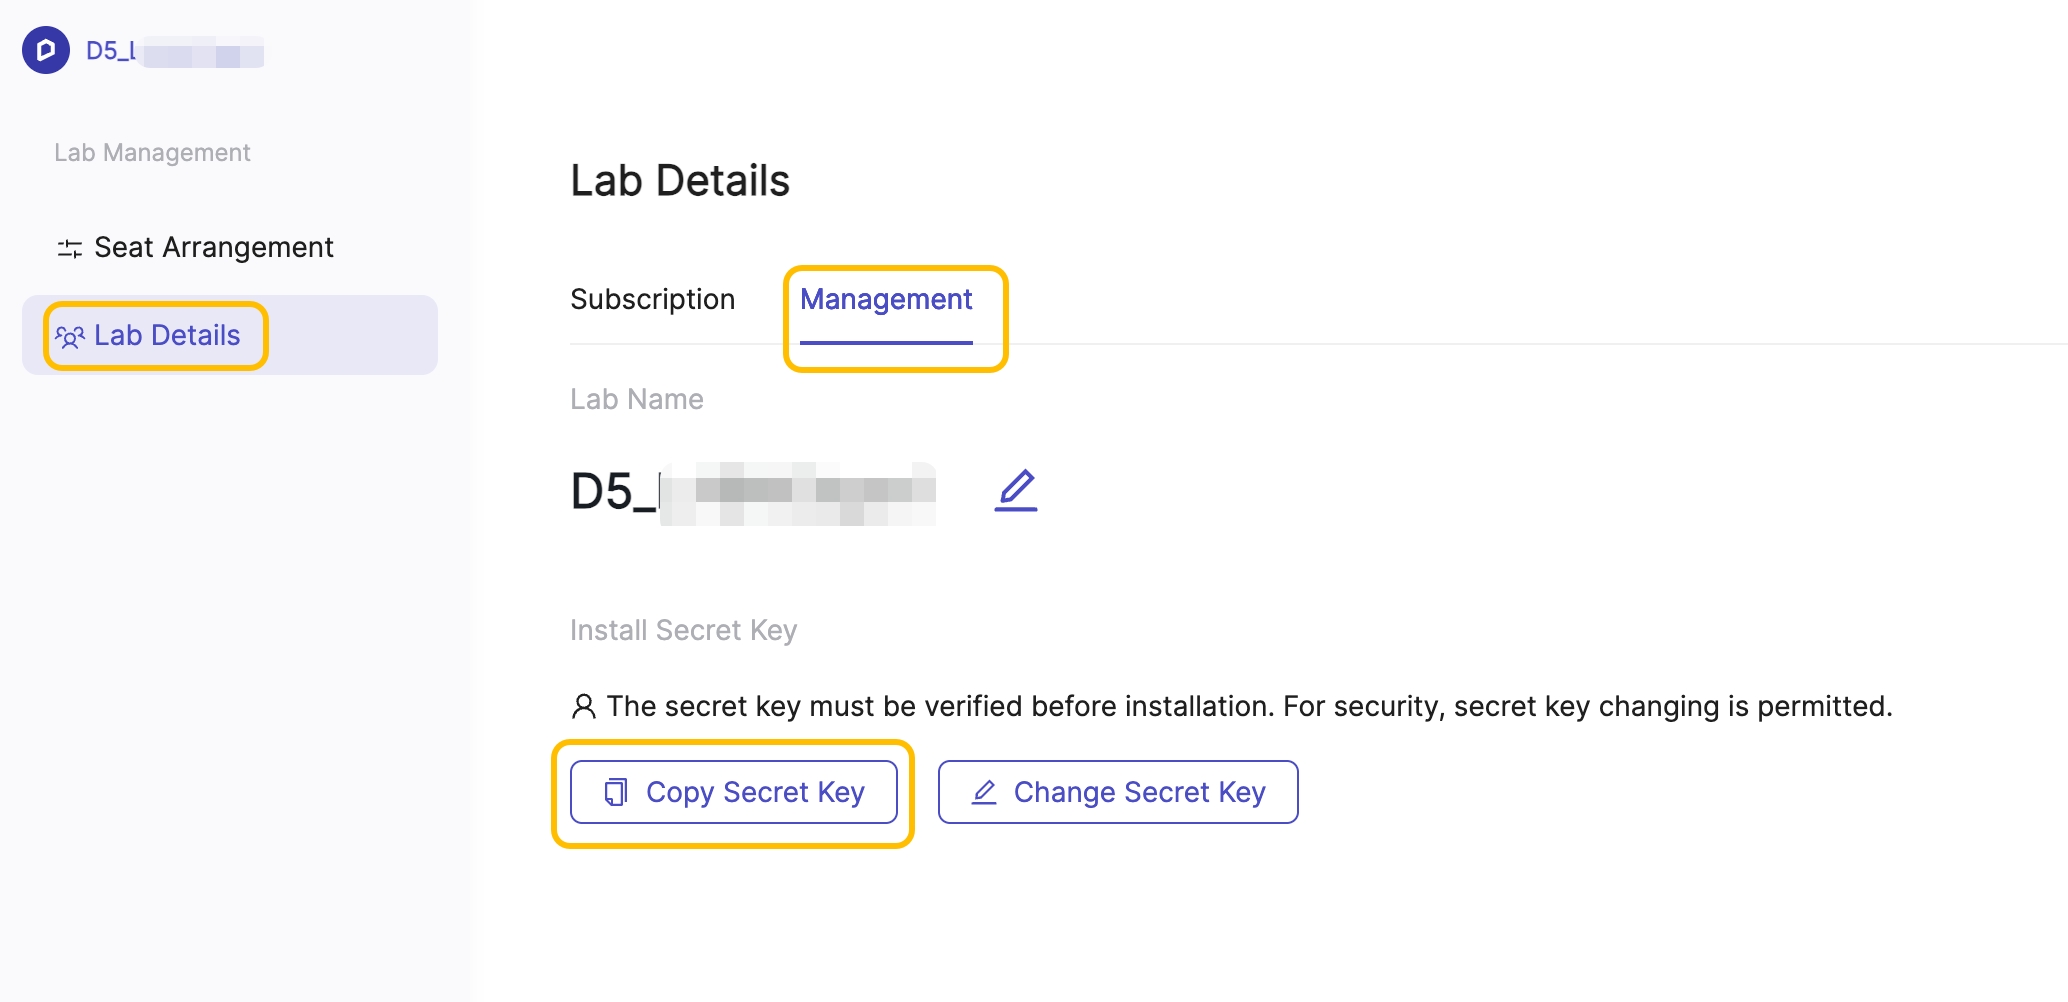
- Log into the LAB Management backend https://lab.d5render.com/seat
- Select Lab Details.
- Select Management.
- Copy the Secret Key.
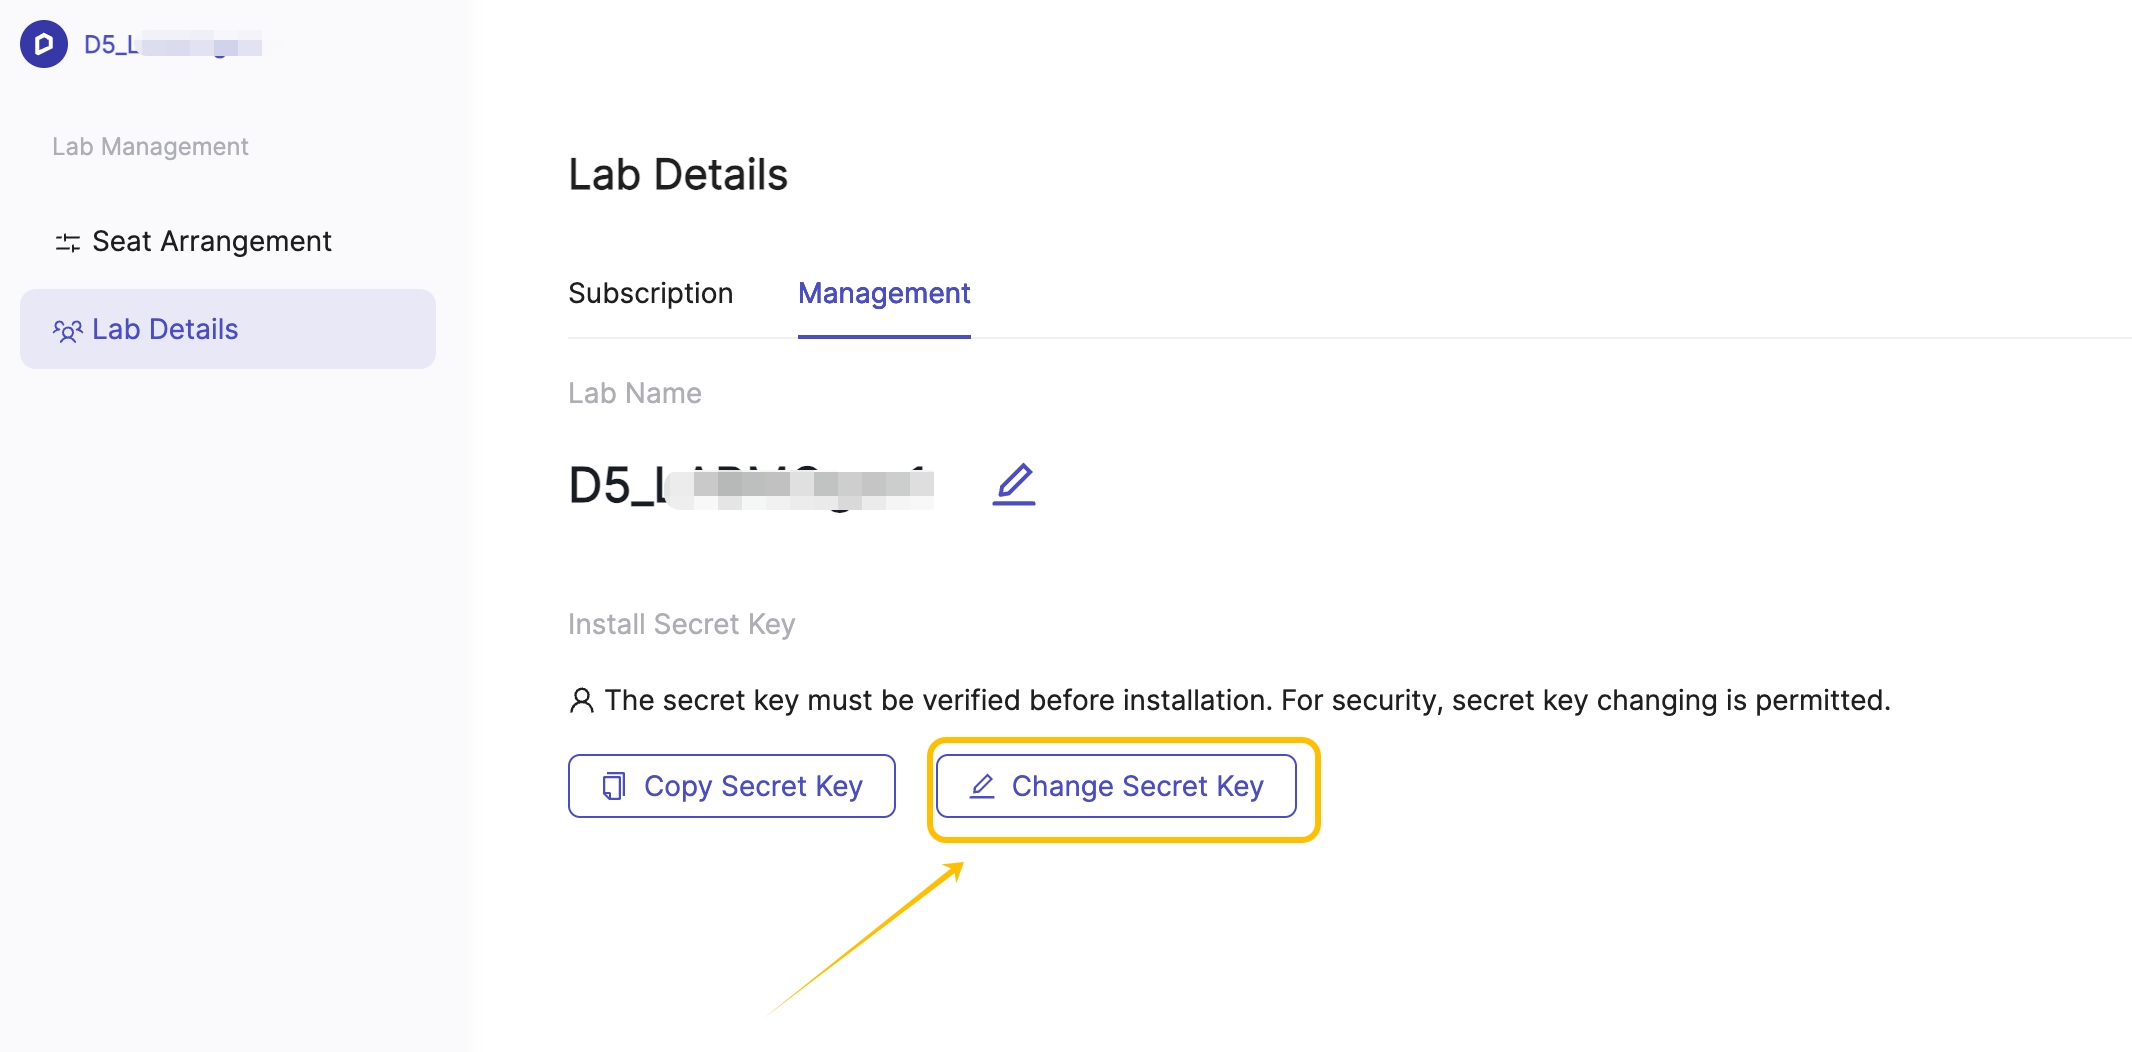
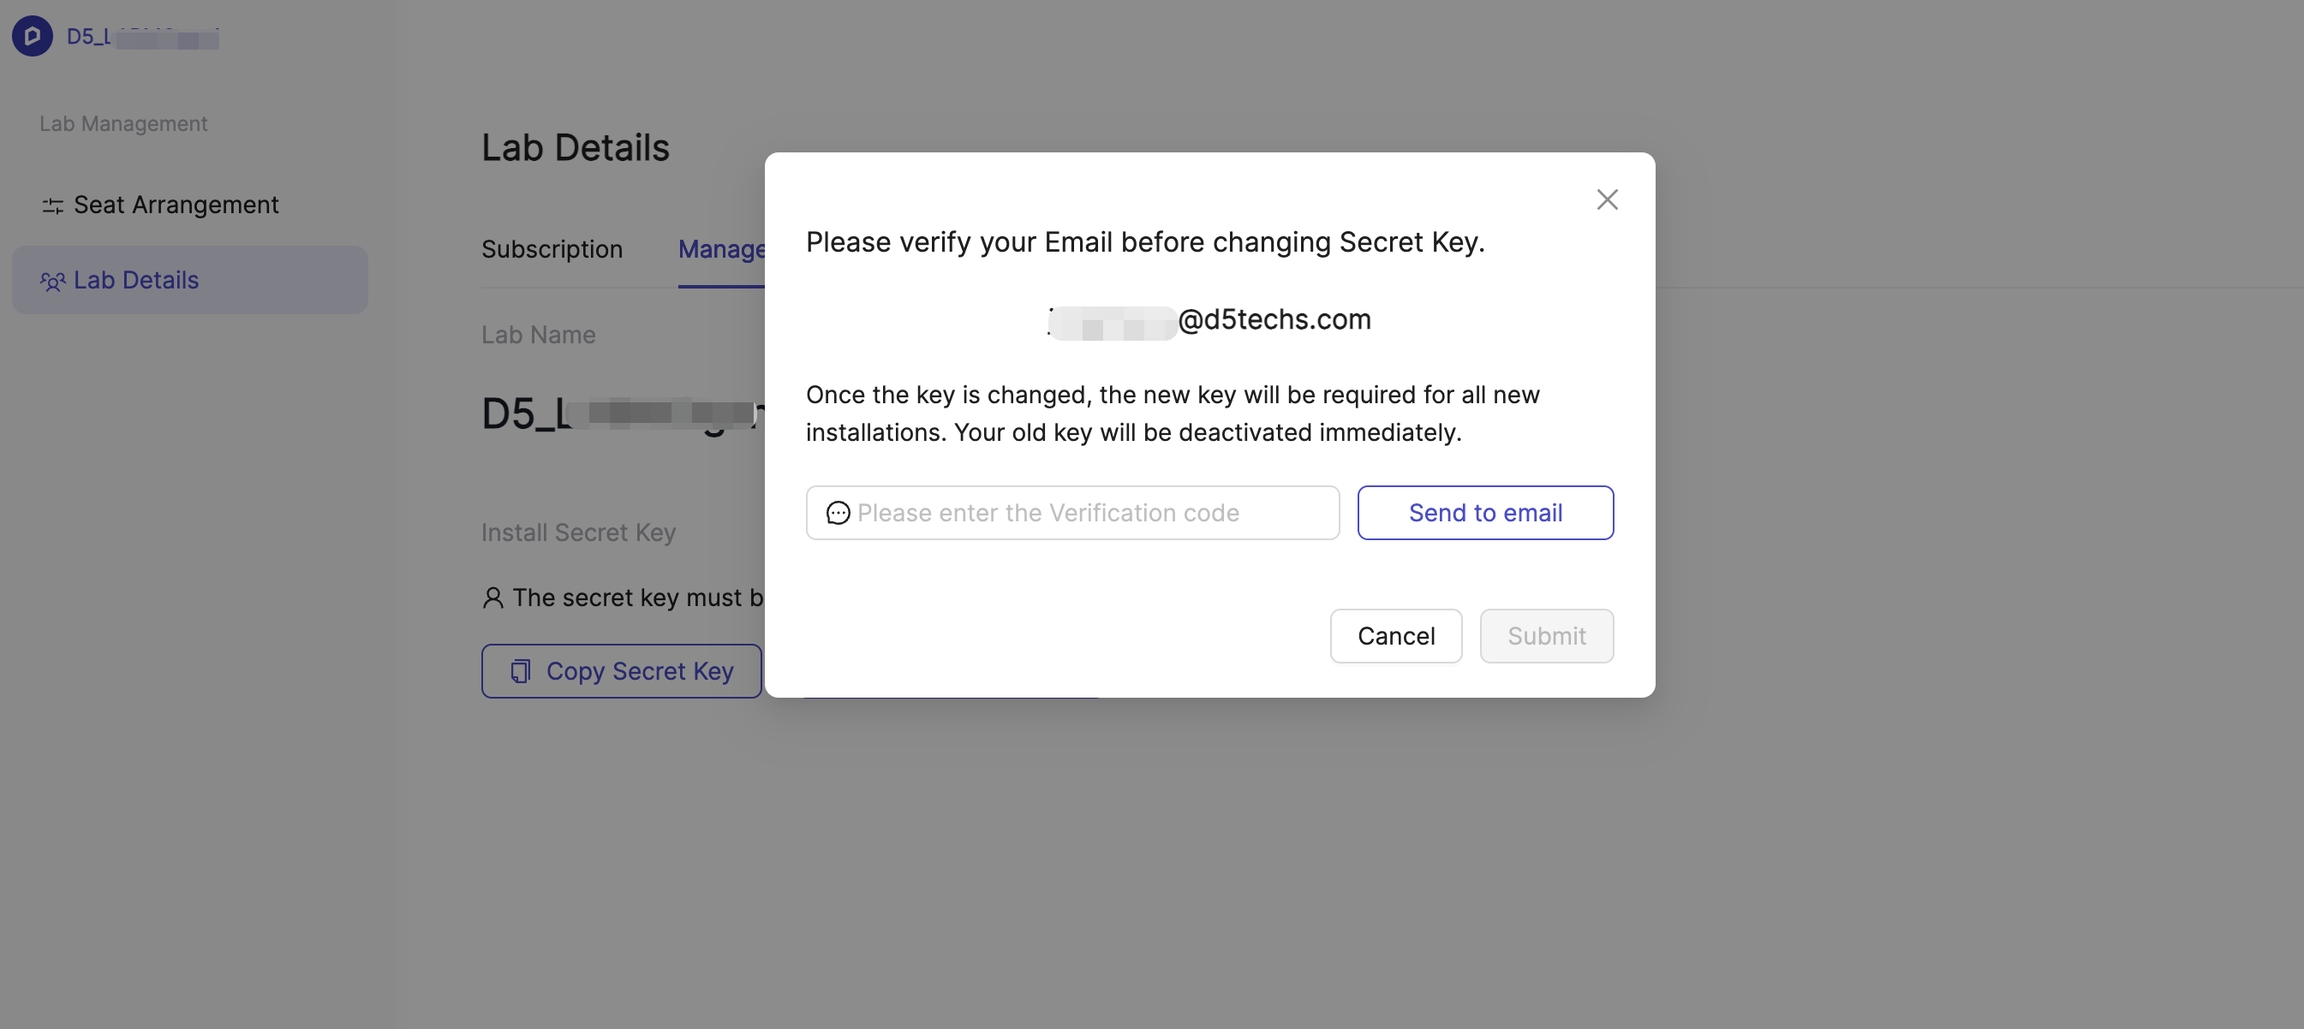
If your Secret Key is compromised or needs to be updated, click Change Secret Key. You will be asked to verify your identity via email before the change is applied. Once updated, the previous key becomes invalid immediately, and the new key will be required for any future installations. Existing devices that are already activated will remain unaffected. 👇
3.2 Script Installation Guide
We provide two installation methods. Please choose the one that best suits your needs. If you require batch installation, we recommend using Method 2: Silent Installation.
① Standard installation
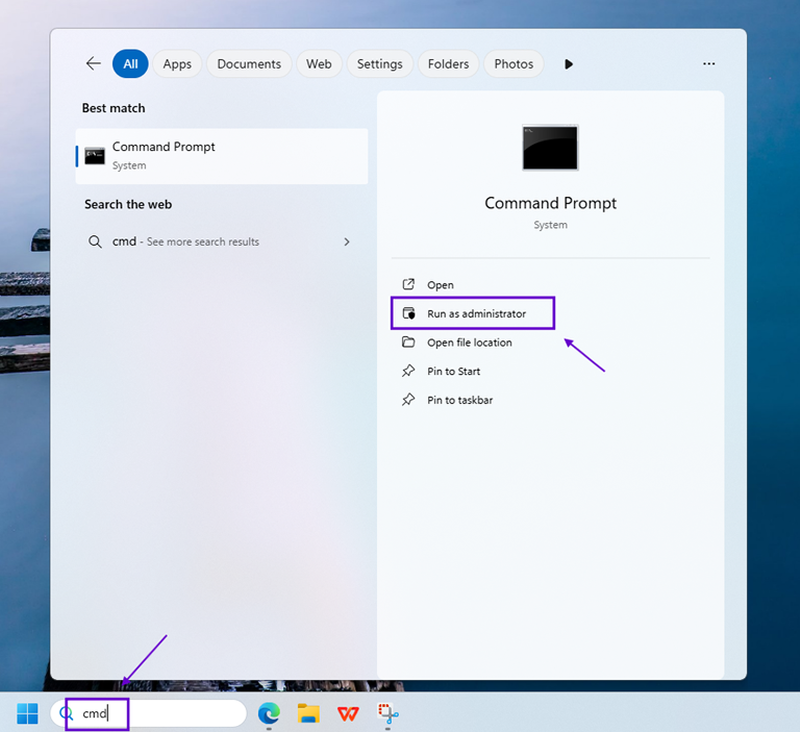
1️⃣ Navigate to the folder where the installation package is stored. Click the address bar, type cmd, and press Enter to open the Command Prompt in that directory.👇

2️⃣ Run the following command, replacing [Latest_Installer_File_Name].exe with the actual installer file name from the Lab Management Backend, and xxxx with your Installation Key (labSecret):
"[Latest_Installer_File_Name].exe" -labSecret=xxxx (for demonstration purpose only)
Note:
- The installer file name (e.g., D5_Render_installer-2.9.5.0537.exe -labSecret=xxxx ) shown above is for demonstration purposes only.
- The installation package for the Lab License is regularly updated. Always download and use the latest version from the Lab Management Backend → Install Scripts.
- To obtain your Installation Key: Log in to the Lab Management Backend → Go to Lab Details → Click Management → Copy the Secret Key, and replace xxxx in the command with it.
Example (for demonstration purpose only):

Reminder:
- The installer file name will change with each version.
- Always refer to the latest installation package in the Lab Management Backend → Install Scripts.
② Silent installation
1️⃣ Open the Command Prompt as Administrator and navigate to the directory containing the installation package.

2️⃣ Enter the following command, separating each parameter with a space. Be sure to use double quotes where required.
Again, replace [Latest_Installer_File_Name].exe with the actual installer file name from the Lab Management Backend, and xxxx with your Installation Key (labSecret):
- "[Latest_Installer_File_Name].exe" [Required - Use the latest installer from the Lab Management Backend]
- labSecret=xxxx [Required - Replace xxxx with your Installation Key]
- silent=true [Required]
- installPath="xxx" [Required - Target installation directory] e.g., -installPath="D:\D5 Lab"
- workspacePath="xxx" [Optional - Path for asset storage] e.g., -workspacePath="D:\D5Lab Workspace"
- agreeEula [Required - Indicates acceptance of the EULA]
- isForCurrentUser=true [Optional - Enabled by default]
Example (for demonstration purpose only):
"D5_Render_installer-2.9.5.0534.exe" -labSecret=xxxx -silent=true -installPath="D:\D5 Lab" -workspacePath="D:\D5Lab Workspace" -agreeEula -isForCurrentUser=true

Reminder:
The installer file name will change with each version.
Always refer to the latest installation package in the Lab Management Backend → Install Scripts.
Note:
The workspacePath defines where downloaded assets and libraries are stored.
After entering the command, press Enter. Once the message "Press enter to continue" appears, the installation is complete.
Batch Installation
Batch installation requires the use of a computer lab management system. Since each computer lab's setup may vary, detailed instructions are not provided here. If you encounter any issues, please contact your D5 point of contact or reach out to us at edu@d5techs.com.


.jpg)


.png)

1%20(2).png)


%20(1).png)
.png)

.png)