Ever feel like your early design concepts get lost in a sea of photorealistic details? Here’s a secret: sometimes, stylized art communicates your vision more powerfully than perfect realism ever could.
The good news? In D5 Render, you can create expressive, editorial-style visuals in minutes—all within a straightforward, two-stage workflow. First, use real-time tools like AO (Ambient Occlusion) and Outline Mode to explore ideas and get fast buy-in. Then, for those final renderings, add a unique, artistic layer with a single click of AI Style Transfer.
This guide will walk you through exactly how to do both. Let’s dive in and make your designs speak louder than ever ?
Key Takeaways for Creating Stylized Art in D5 Render
- Use AO and Outline Mode in D5 Render to shape readable, real-time stylized art that sells concepts fast.
- Lean on clay renders—AO on, materials off—for clean geometry checks and quicker stylized art approvals.
- Flip to solid backgrounds, white outlines, isometric camera, and smart color grading in D5 Render for CAD-inspired stylized art.
- Finish with AI Style Transfer to turn approved D5 Render images into publication-ready stylized art.

1. Real-Time Stylized Art in D5 Render
① AO + Outline Mode: Your Real-Time Stylized Art Tools
Ever wish you could give your early concepts that clean, intentional look—without spending hours in post? With D5 Render, you can.
Here’s how: open your Effects panel (make sure nothing’s selected!), scroll down, and you’ll find two powerful toggles: AO and Outline Mode. Think of them as your go-to duo for real-time stylized art.
AO (Ambient Occlusion)—is like a depth booster. It gently shades corners and tight spaces, making forms feel grounded and readable, even before you add materials. It’s perfect for signaling “this is a concept,” not a final render. Toggle the AO overlay in preview mode to see it blend naturally into your scene—and feel free to dial the intensity up or down to match your vision.
Ambient Occlusion (AO) in D5: What It Is & How to Master It
Then, bring in Outline Mode:
- Start with a classic black stroke, or soften things up with gray. Adjust opacity like you would in Photoshop—lighter for subtlety, bolder for emphasis.
- But don’t stop there: turn on Contours to introduce a second line style for finer details—like cabinet grooves, trim edges, or smaller objects. This layering adds clarity and dimension, especially in flat or neutral lighting.
Finally, play with Line Width—50 is a great starting point—and be sure to enable distance-based thinning, so elements in the background don’t feel heavy or overwhelming.
Together, AO and Outline Mode give you expressive, presentation-ready visuals in minutes—ideal for schematic reviews, client check-ins, or whenever you want your ideas to look polished, yet perfectly in progress.
② Clay Renders: Your Shortcut to Clearer Feedback
Let’s be honest, sometimes you just need a fast, clear way to get client sign-off on the model itself, without getting sidetracked by material choices. This is where D5’s clay modes truly shine for creating practical, purposeful stylized art.
You have two fantastic options.
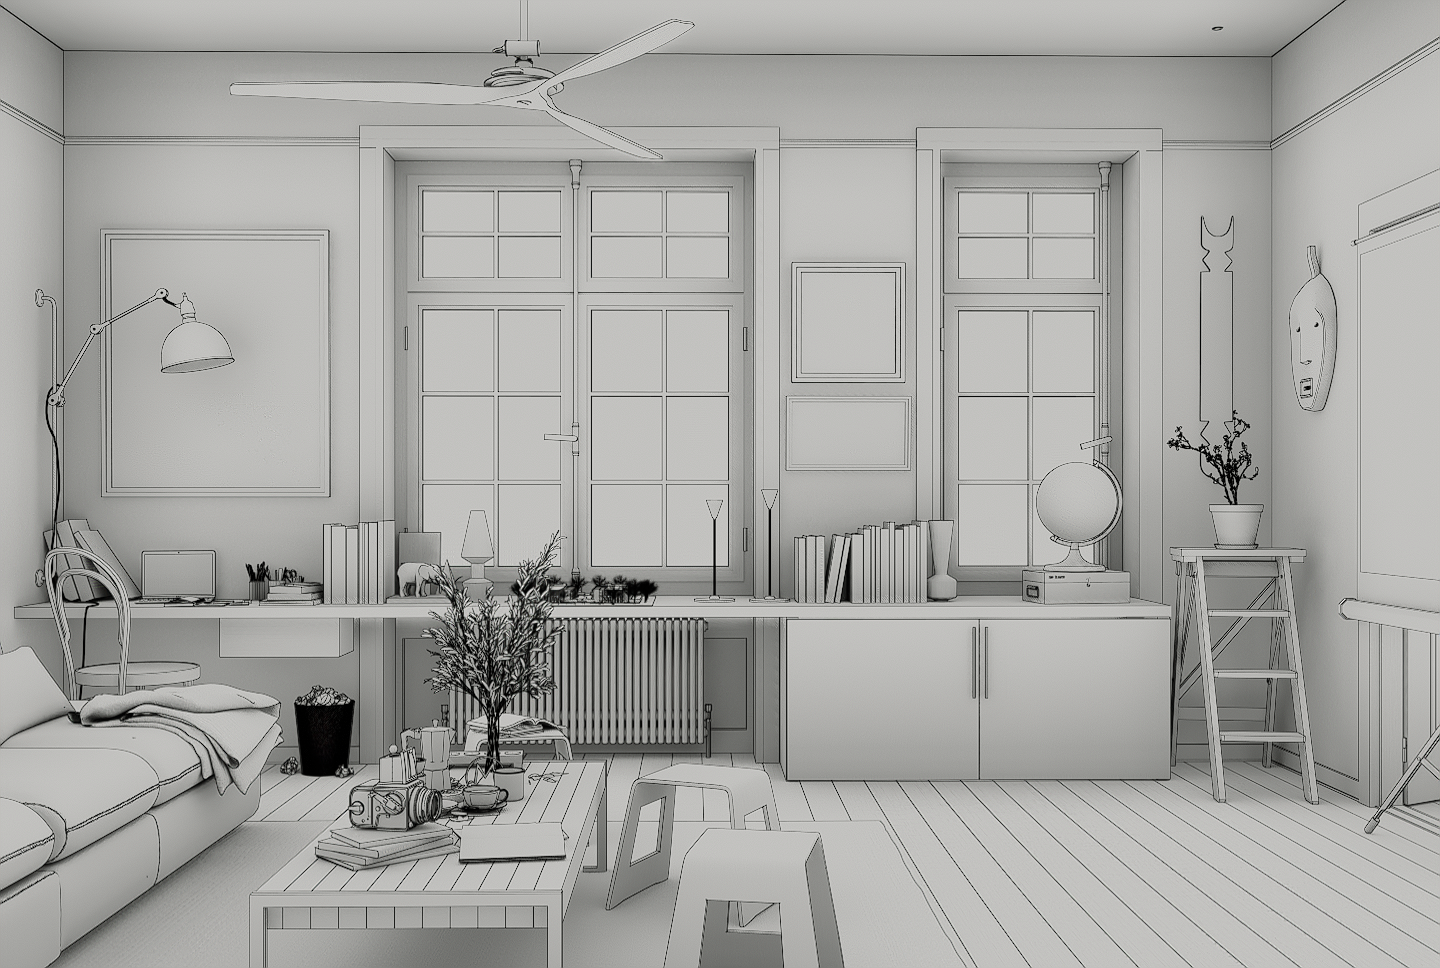
- The first is a render-ready clay look, achieved by turning on AO while materials are off. This bakes those soft, defining shadows directly into your image, perfect for a quick, presentable deliverable.
- The second is the viewport-only clay mode, which is your go-to for real-time “geometry checks.” Orbit around, spot any modeling gaps with your client, and ensure everyone is aligned on the core design—before you’ve spent hours on textures and lighting.
By stripping the scene back to pure form and light, this approach to stylized art keeps the focus exactly where it should be: on proportion and massing. It streamlines feedback, avoids costly late-stage revisions, and makes the entire approval process smoother.
A little pro tip: Keep those subtle outlines enabled. They add that crisp definition that elevates a flat gray model into a confident, communicative piece of stylized art.
③ Unlock a Graphic, CAD-Inspired Vibe
Want to give your work that crisp, graphic punch that makes portfolios stand out? Many pros have a secret weapon: the CAD-inspired look. Don’t let its high-impact style fool you—achieving it is surprisingly simple. The transformation starts with just three moves:
Start by flipping your background to a solid color—classic black is a powerful choice—and set your outlines to white. Instantly, your scene transforms into a clean, impactful graphic that feels both modern and intentional. This isn’t just a render; it’s a statement piece for presentations and mood boards.
Then dive into the Color Grading panel. A subtle nudge in contrast or a bold background switch to salmon or teal can completely redefine the narrative of your stylized art. It’s amazing how color alone can tell a different story.
Unlocking Color Grading in D5 Render: The Effect Panel Guide
What is a LUT? A Guide to Color Grading in 3D Rendering
For the final touch, pair this with the Isometric Camera. This tool locks your view into a perfect 2D-like perspective, making those clean outlines and contours truly sing. The result? A striking, gallery-worthy graphic that communicates your design intent with clarity and style—all achieved in moments, not hours.
2. AI Style Transfer Finishes in D5 Render
You’ve nailed the model, the lighting is perfect, and the client is on board. So, how do you transform this approved render into a piece of art that stops scouts? This is where D5’s AI Style Transfer comes in—think of it as your personal digital finishing studio.
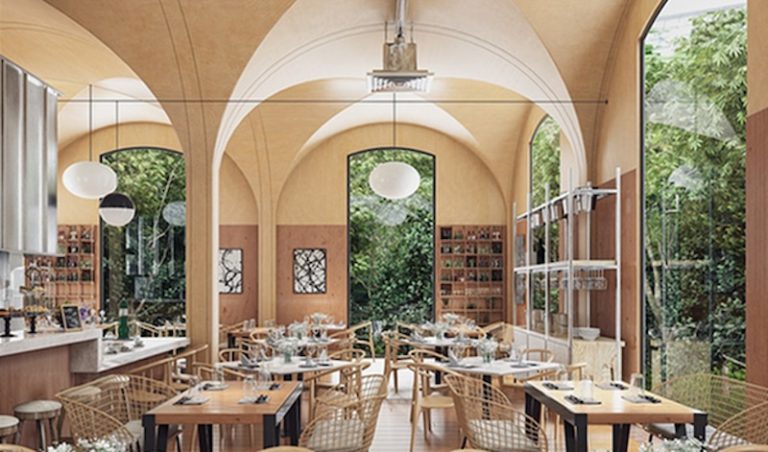
Once your base render is complete, you can apply artistic filters like the soft, expressive washes of Watercolor or the precise, graphic linework of Pen Sketch. Since D5’s AI-powered styles are applied to your exported image, they don’t slow down your real-time workflow, making them perfect for producing those high-impact, publication-ready hero visuals.
Architectural Rendering Styles Made Easy with AI Style Transfer
3. Conclusion: Master Stylized Art and Elevate Your Designs
So, there you have it! Mastering stylized art in D5 Render isn’t just a cool trick—it’s a powerful way to make your designs clearer and more impactful. From quick concept sketches with AO and Outline Mode to that final artistic flair with AI Style Transfer, you now have the secrets to communicate your vision like never before.
Don’t just render—express. Start using these techniques in D5 Render today and watch your projects stand out.
Continue Reading for More Tricks on Stylized Art in D5 Render
Unlocking Color Grading in D5 Render: The Effect Panel Guide
Ambient Occlusion (AO) in D5: What It Is & How to Master It
Architectural Rendering Styles Made Easy with AI Style Transfer
Go-To Tricks for Quick & Stunning Architectural Section Drawing Renders
What is a LUT? A Guide to Color Grading in 3D Rendering
How is AO used in Style? What effects can be achieved?
FAQs on Creating Stylized Art with D5 Render
Q. How can I make my architectural portfolio stand out without spending hours on post-production?
To create impactful visuals quickly, stylized art can help communicate your design’s essence without the complexity of photorealism.
D5 Render lets you craft clean, artistic renders using simple tools like AO and Outline Mode for depth and clarity. With AI Style Transfer, you can easily apply artistic effects like watercolor or pen sketch finishes to your renders—giving your portfolio a professional edge in minutes.
Q. How do I create compelling visuals for client presentations without overcomplicating my designs?
In client presentations, clarity and impact are key. Stylized art, like soft AO shadows and sharp outlines, highlights the design’s key forms and volumes without overwhelming clients with unnecessary details.
D5 Render’s real-time tools and AI Style Transfer offer an efficient, artistic solution to produce striking visuals that grab attention and communicate your concept effectively, without extra post-processing time.
Q. What’s the best way to showcase creative concepts early without focusing too much on final details?
When presenting early concepts, it’s crucial to focus on form, massing, and spatial ideas. D5 Render’s AO and Outline Mode provide a quick way to generate clean, readable visuals that are perfect for brainstorming or initial presentations. These real-time features let you explore different stylistic approaches, making it easier to get quick client feedback while keeping the design process fluid.
Q. How can I quickly generate architectural visuals with a modern, artistic flair for social media or presentations?
Stylized art can add a modern, eye-catching flair to your visuals. D5 Render’s ability to quickly switch to a CAD-inspired style with solid backgrounds, white outlines, and easy color grading makes it the perfect tool for creating bold, gallery-worthy renders.
This workflow allows you to present your designs creatively and professionally, making your work stand out on social media, mood boards, and presentations.
Q. Can AI help me generate artistic renderings without sacrificing render time or quality?
Yes! D5 Render’s AI Style Transfer lets you add an artistic layer to your final render in seconds—whether you want a watercolor effect, a pen sketch, or any other art style.
Because this process happens after rendering, your real-time design work is unaffected, giving you fast, high-quality results. This is ideal for designers who need to balance speed with creativity.
Q. What tools can I use to enhance my renders and make them more engaging for clients?
D5 Render’s combination of real-time stylized art tools and AI capabilities make it simple to elevate your renders. By adding soft AO shadows, bold outlines, or creative color grading, you can craft renders that feel more artistic and engaging.
Plus, the AI Style Transfer gives you the flexibility to transform your visuals into stunning artwork, ensuring they capture client interest and spark excitement.