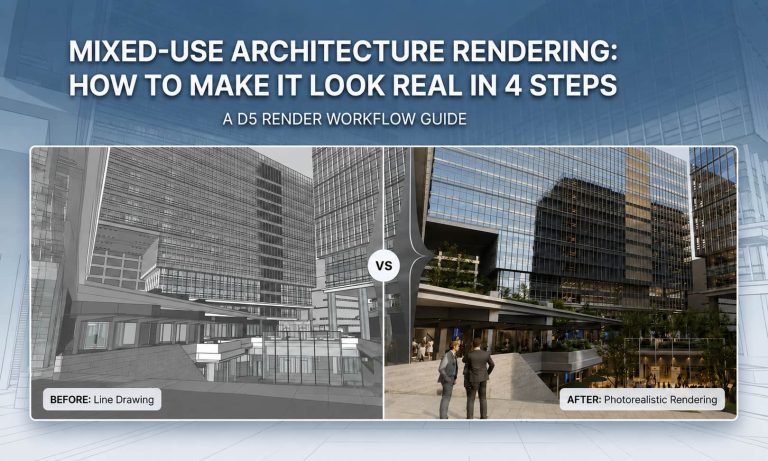
Every architect wants to render their models faster without wrestling with complex software. In this practical SketchUp tutorial, rather than focusing on complicated export workarounds, we will show you how to render natively inside your interface using a powerful plugin—D5 Lite.
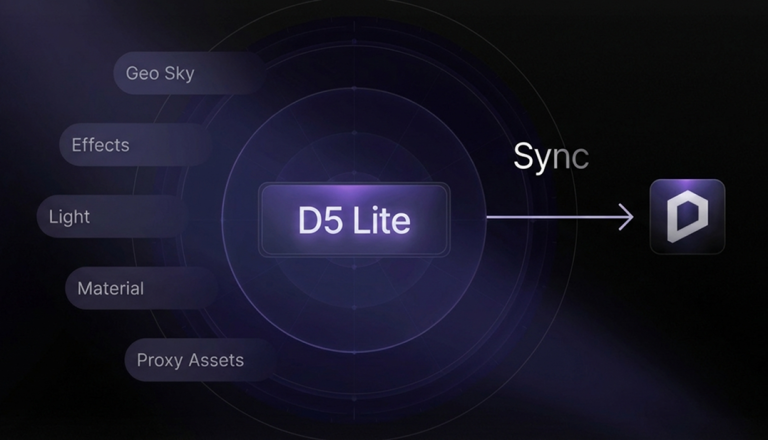
Built as an AI-native, real-time visualization plugin, D5 Lite integrates directly into your modeling tool. Beyond incorporating the cutting-edge AI logic of Nano Banana Pro into its ecosystem, D5 has transformed what is typically an isolated 'art generator' into a precision architectural tool. Unlike standalone software that disrupts your focus with constant file exports, it supports your design process from the initial massing stage. Whether you are generating quick AI stylistic references or outputting final-stage images, this tool adapts naturally to your workflow.
Key Takeaways: Mastering D5 Lite Inside SketchUp
- Skip the Exports: D5 Lite runs natively inside SketchUp, eliminating frustrating file transfers from your workflow.
- AI Brainstorming: Instantly turn basic massing blocks into detailed design concepts without ever leaving your interface.
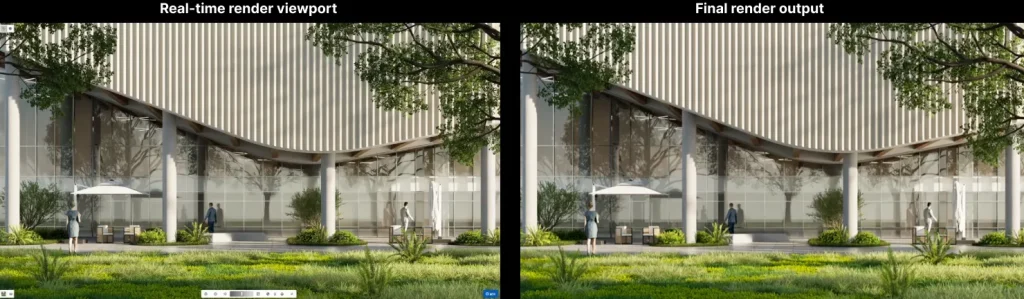
- Real-Time Rendering: Fine-tune realistic materials and lighting with fluid, path-traced visual feedback.
- Zero Lost Work: Push your exact setup directly into the full D5 Render when projects demand cinematic presentations.

Setting Up Your Workspace
Setting up D5 Lite takes just a few minutes. It operates as a highly responsive floating window directly within SketchUp (supporting versions 2021–2026), cleanly integrating into your existing 3D workflow.
Here is a quick setup guide:
- Download the Launcher: Visit the official D5 Render website to download and install the D5 Launcher.
- Install D5 Lite: Open the Launcher, navigate to the left-hand "Workflow" tab, locate D5 Lite, and click Install.
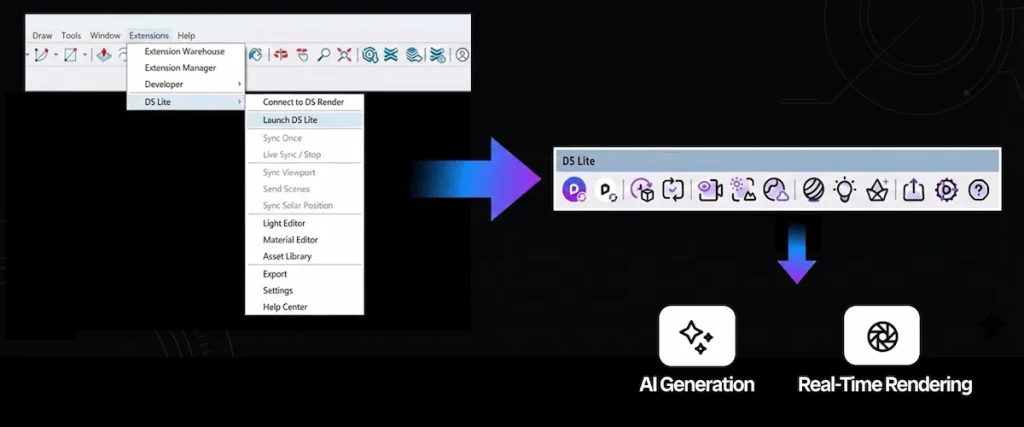
- Launch in SketchUp: Open your SketchUp model. Locate the D5 Lite icon at the top of the interface to start the plugin.
- Customize Your Workspace: D5 Lite opens as a responsive floating window. You can freely resize it, maximize it, or press F9 to hide the UI entirely when you need to focus solely on your geometry.
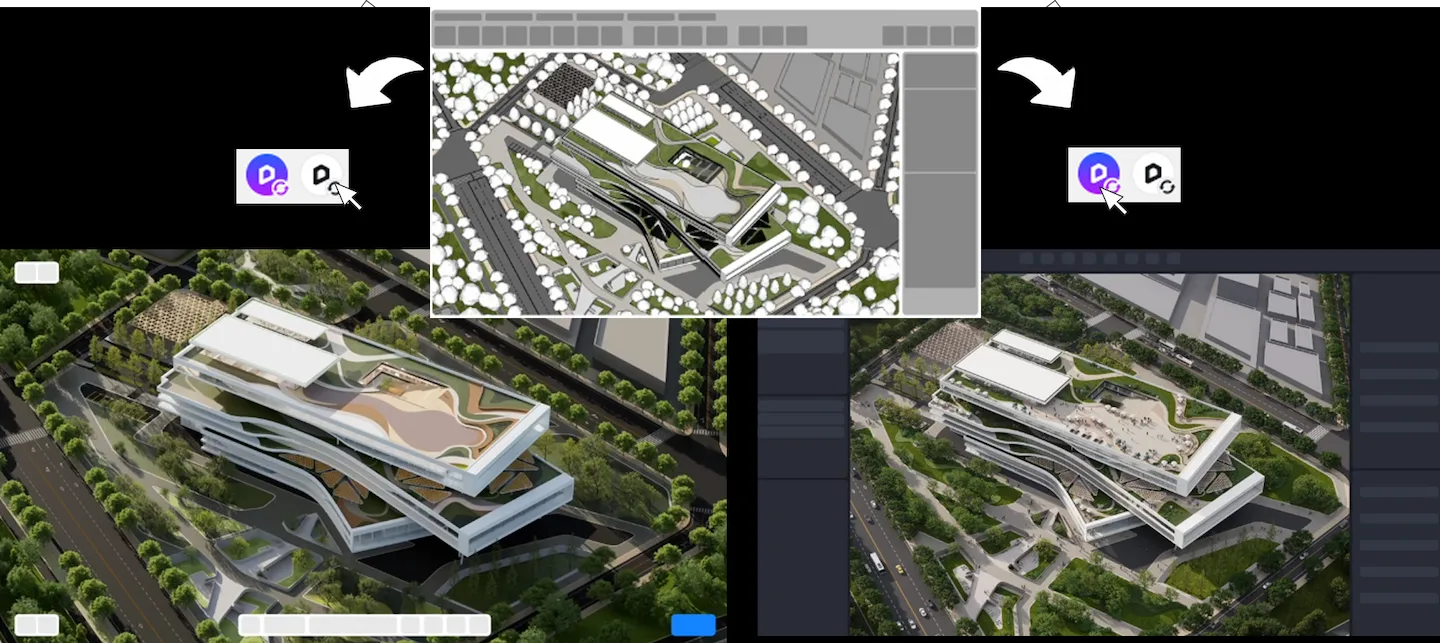
D5 Lite is built around two primary modes: AI and Render. You can easily switch between them at any time, adapting the tool to whatever your current design stage requires.
D5 Launcher Guide: The Central Hub for D5’s AI-Driven All-in-One Workflow
SketchUp Tutorial Part 1: Exploring D5 Lite's AI Mode
Think of D5 Lite's AI mode as your digital design assistant. If you have ever been impressed by the creative capabilities of Nano Banana Pro, imagine harnessing that exact level of AI power directly within your 3D viewport, but strictly tailored for spatial design. D5 Lite's highly effective when you need rapid visual brainstorming or quick iterations, eliminating the need to spend hours tweaking render settings.
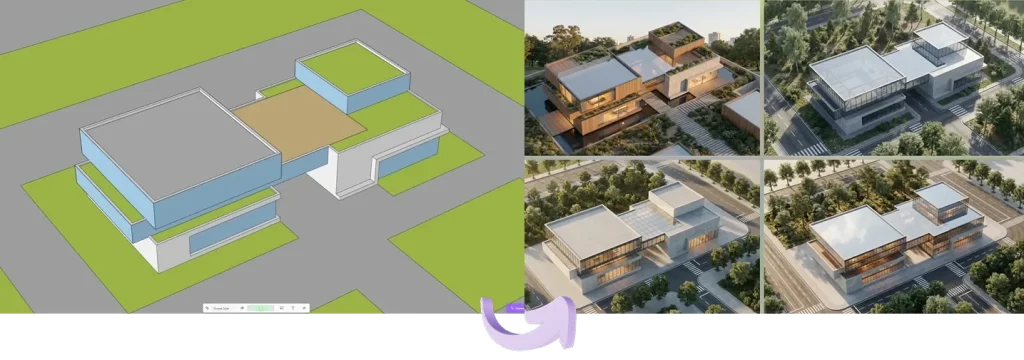
Scenario A: Conceptual Inspiration
During the early phases—when you are working with nothing but basic massing models—the AI can help you lock in a design direction in seconds.
- Capture the View: Frame your shot in the SketchUp viewport, then click the capture button in the bottom-left corner of D5 Lite.
- Select a Style: Expand the AI panel by clicking "Choose Styles." Here, you will find categories tailored specifically for spatial design, such as Architecture > Residential > Villa.
- Set to Creative: Slide the "Structure Weight" to the Creative level. This allows the engine to generate varied, expressive architectural concepts based on your simple massing blocks.
- Generate: Add optional text prompts to describe a specific mood or material palette. Adjust the image count, click Generate, and use these visual references to guide your ongoing modeling.
Scenario B: Precise Visuals & Rapid Iteration
If your SketchUp model is heavily detailed and you simply need a high-quality visualization without the manual setup:
- Capture and Define: Frame your view and select a style preset that matches your project.
- Set to Accurate: Drag the "Structure Weight" slider all the way to Accurate. The AI will strictly respect your existing geometries and material textures, producing a refined image instantly.
3. Iterate on the Fly: For example, if you are rendering a bedroom and realize the closet is empty, use the AI text box to describe what is missing (e.g., "hanging clothes") and click Iterate. The tool will seamlessly populate that specific area for you.
SketchUp Tutorial Part 2: Real-Time Rendering & Materials
Switching to Render mode engages the proprietary D5 Engine, delivering physically accurate, real-time feedback. By default, your SketchUp camera is synchronized with D5 Lite. To unlink them for independent navigation, simply click the "Sync Viewport" toggle.
What is D5 Engine? A Proprietary Core Built for Spatial Design
1. Navigating & Saving Your Views
Before diving into materials, it helps to establish your workflow inside the viewport. You can navigate the D5 Lite spatial environment using standard WASD keys combined with your right mouse button. Once you frame the right angle, use the Scene List. It stores all your camera views, allowing you to add new perspectives or update existing ones with a single click—while remaining strictly synced with your SketchUp scenes.
2. Material Workflows
High-quality textures are the foundation of architectural realism. Simply select any surface in SketchUp, open the D5 material editor, and apply one of our optimized templates:
- General Template: Built for standard architectural surfaces like timber flooring or custom cabinetry. Drop in your diffuse map, then fine-tune the normal, specular, and roughness values.
- Glass Template: The engine natively calculates complex refraction and transparency. Need frosted glass for an interior partition? Just increase the roughness slider.
- Metal Template: For highly polished finishes, switch to the Metal Template and dial the color toward black. For brushed aluminum, simply introduce a touch of roughness.
- Emissive Template: Turn any geometry into a realistic light source. This is perfect for LED strips, cove lighting, or screen panels—just adjust the brightness and color temperature.
- Water & Grass: Switch to the Water Template to easily control depth, color, and wave normals for realistic pools. For exterior shots, apply the Grass template to any ground plane to generate 3D greenery with controllable height and density.
3. Environment, Exposure, and Effects
Achieving true photorealism relies heavily on your environmental lighting. Using the Environment panel, you can load custom HDRIs to light your scene accurately, adjusting their overall intensity and rotation.
Next, calibrate your baseline lighting using the manual Exposure slider, or toggle Auto-Exposure for an instant, physically based balance. You can even fine-tune the final mood—tweaking contrast, saturation, and color temperature—directly in the Effect panel, eliminating the need for external post-processing.
4. Lighting & Optimized Assets
For artificial lighting, D5 Lite offers five distinct types: Point, Spotlight, Strip, Rectangle, and Disc. Place a light source in SketchUp, and its shadows and intensity sync instantly within the Lite viewport.
When it's time to populate your scene, you can pull assets directly from the built-in D5 Render library, or easily bring in premium models from D5 Works (our curated asset platform for spatial design). Whether you are placing high-quality vegetation or bespoke furniture, these models automatically appear as lightweight proxies in your SketchUp file. This keeps your modeling viewport running smoothly without sacrificing real-time render fidelity.
D5 Works is Here: Your Curated Hub for AEC-Ready 3D Models
Scaling Up: The Seamless Transition to D5 Render
Once your lighting and materials are dialed in, exporting a high-quality still image from D5 Lite is straightforward—simply set your resolution and aspect ratio, and render.
But architectural workflows can be unpredictable. If a project's scope expands and the client requests animated walkthroughs or cinematic tours for presentation, you aren't stuck starting over.
You can transition any D5 Lite scene directly into the full version of D5 Render. Simply close the Lite viewport, click the main D5 icon in your SketchUp toolbar, and launch a new project. Every material tweak, light placement, and proxy asset will carry over intact. You pick up exactly where you left off, ready to access advanced animation tools without losing a single minute of your prior work.
Ready to Render Smarter with D5 Lite?
Don't waste time bouncing between different tools. By bringing AI brainstorming and real-time path tracing directly into your workspace, D5 Lite helps you focus on what actually matters: your design.
From generating instant concepts to dialing in realistic materials, it keeps your creative momentum going without the headache of constant file exports. Ready to stop managing software and start enjoying the visualization process? Download D5 Lite today and see how fast your workflow can really be.
Explore More: Advanced SketchUp Tutorials >>
Introducing D5 Lite: AI Rendering & Instant Visualization for SketchUp
Essential SketchUp Interior Rendering Tips You Need!
Best practices of interior lighting for SketchUp
SketchUp Free + D5 Pro: Get Pro Renders Effortlessly
How SketchUp landscape design benefits from real-time rendering
Best Free High-Quality SketchUp Textures
FAQ: Mastering Your D5 Lite & SketchUp Workflow
The most efficient method today is using a real-time rendering plugin like D5 Lite. Instead of waiting hours for traditional frame-by-frame renders, it brings real-time path tracing directly into your SketchUp workspace. You get instant visual feedback as you tweak materials and lighting. This essentially blurs the line between 3D modeling and final visualization, saving you hours of re-rendering.
Yes, D5 Lite includes a built-in AI mode tailored specifically for architectural ideation. Think of it as a creative partner inside your SketchUp interface. You can capture a viewport, type a quick prompt, and let the AI generate stylistic references or even populate empty rooms for you. It's ideal for rapid brainstorming during early design phases without all the manual heavy lifting.
Absolutely. D5 Lite operates as an integrated floating window within SketchUp, removing the need for annoying file exports or clunky third-party bridges. Your camera, lighting, and geometry are live-synced. If you move a wall or change a texture in your SketchUp model, the update appears instantly in the Lite viewport, keeping your workflow fluid.
The most effective way to prevent viewport lag is by using lightweight proxies. Inside D5 Lite, you can place high-quality vegetation and furniture directly from the built-in library, and they will automatically appear as simplified proxies in your SketchUp file. This keeps your model responsive and prevents file bloating, even when you're using scatter plugins to generate dense forests or complex landscapes.
Yes, it's a game-changer for the schematic design phase. In D5 Lite's AI mode, you can frame your basic massing blocks, select a style (like Residential or Commercial), and set the Structure Weight to "Creative." The engine will instantly visualize detailed architectural concepts based on your rough shapes. It's perfect for exploring different design directions and materials before you dive into heavy modeling.
Instead of manual slider tweaking, use the optimized material templates in D5 Lite. Simply select a surface in SketchUp and apply a native preset like Glass, Metal, or Water. The engine handles the complex PBR (Physically Based Rendering) calculations for you. For instance, applying the Water Template to a flat plane instantly gives you realistic refraction and wave normals, achieving a professional look with minimal effort.